Pages

Saturday, November 29, 2008

THANKSGIVING AT THE BEACH


This Thanksgiving Guy and I are thankful for friends. Our sons and other family members all live too far away to have Thanksgiving dinner with us, but for the past two years, our friends, Dale and Ed, have invited us to share their Thanksgiving dinner at their beachfront home on Topsail Island, NC, about 1-1/2 hours from our home in New Bern. The weather, which had been unseasonably cold, decided to bless us with a glorious day filled with sunshine and balmy temperatures, a little above 60 degrees. Who could ask for anything more?
Dale's daughter, Pam and friend, Robert, and son, Curt, and wife, Dee, were also with us. Pam's friend, Carol, stopped in for a while, too. As usual, we goofed by not taking enough photos, especially of the group. But at least we have some. Pam has a 4-month old Min-Pin (miniature Dobermann Pinscher), "Mr. Big." I said he's part kangaroo (because he hops), part Chihuahua (because of his big ears) and part pinscher because of his body lines. A real cutie, he's loaded with energy and he reminded me of why I no longer want to commit to a pet.
Dale only asked me to bring a pumpkin pie, as she was loaded with
food. Pam and Robert both hail from Washington, DC; and Curt and Dee live in Ohio, so everyone was staying at the beach house, except us, of course. Since it's Dale and Ed's second home, this was a casual get-together, my favorite kind. No fuss, no muss.
Dale cooked most of the meal, and she is a seasoned, experienced cook. Since Robert is a sous chef (in addition to his regular full-time job which requires him to travel constantly), he decided to make biscuits which were to die for. I didn't want to know what was in them -- they were too good. Dale's turkey was cooked to perfection, moist, tender and very flavorful. Dressing, gravy, roasted veggies, sweet potatoes with cranberries and pecans, marinated asparagus, onion-cheese casserole and cranberry sauce rounded out the meal. But that wasn't enough. Dale also made plum pudding -- a tradition in her family. I had never tasted plum pudding and was anxious to try it. She made hard sauce and warm lemon sauce to go with the pudding; and I tried both. Two thumbs up, way up for plum pudding. By the time we got to the pumpkin pie, no one had any room, but we stuffed down a sliver. I'll post my recipe asap. It's Cook's Illustrated, and the crust is amazing. The filling was just ok for me, I was disappointed, actually.
Robert's sister makes specialty marmalades and jams, and he gave everyone a jar to take home and try. I picked the Tangerine Marmalade, and can't wait to try it. Robert opened a jar of Blood Orange Marmalade and served it with his yummy biscuits. It was delicious -- we all raved over it.
Thanks, Curt, for carving the turkey -- good job.
Thanks, Dale for a great meal and good company.
Thanks, Robert for the marmalade and those great biscuits.
Thanks, Ed and Dee, just for being there and sharing the holiday with us.
Thanks, Pam, for bringing Mr. Big to entertain us.
We had a great Thanksgiving, and didn't feel so "orphaned," thanks to great friends and their wonderful family.


Friday, November 28, 2008

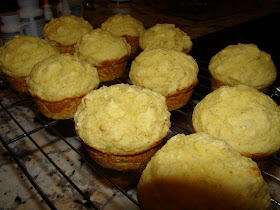
CORN & ONION BUTTERMILK MUFFINS

Here is a wonderfully moist and flavorful corn muffin recipe. I used Basic Corn Muffins, on allrecipes.com as my base recipe, and adapted it. The addition of onions and applesauce and the subbing of buttermilk for milk makes all the difference in these delicious muffins. But the whole-grain stone-ground cornmeal also adds flavor. Whole-grain cornmeal can be hard to find, and you will have to read labels, but it's, oh, so worth it. (Most of the cornmeal in grocery stores is degerminated, so read package ingredients carefully.)
According to what I read and hear, corn bread and corn muffins are best when baked in iron pans or molds. I've never invested in them, but wish I had, because I do love a good corn muffin. That being said, if you're like me with just regular old muffin tins, you'll be very happy with this recipe.

Corn & Onion Buttermilk Muffins
Adapted from Basic Corn Muffins, allrecipes.com
Rating: 9.5 out of 10

INGREDIENTS:
1 tsp. Smart Balance butter spread, or butter or oil
1/2 cup chopped onion
1 cup buttermilk
1/2 tsp. baking soda
1 cup stone-ground whole-grain cornmeal
1 cup all-purpose flour
1/2 cup white sugar
2 tsp. baking powder
1/2 tsp. sea salt
1 large egg
1 Tbsp. canola oil or vegetable oil
1/2 cup unsweetened applesauce

Preheat oven to 400F. Grease 12-cup muffin pan or line with paper muffin liners. (I used non-stick cooking spray.) Melt butter in 8" skillet and add onion. Cook over medium-low heat till onions are transparent, about 4-5 minutes; remove from heat and cool slightly.
Dissolve baking soda in buttermilk; set aside.
Combine dry ingredients in large bowl, mixing well. In smaller bowl, whisk egg, oil and applesauce till well combined. Add buttermilk mixture, whisking again till well combined. Stir in onions and dry ingredients with spatula, and only mix till barely combined, leaving lumps, if any.
Spoon batter into prepared muffin cups, using about 1/4 cup batter for each. Bake 15-20 minutes, or until a toothpick inserted into a muffin comes out with just a few crumbs.
(Note: Baking times are merely guides. You must carefully watch the muffins for signs of doneness. They could be done before 15 minutes, especially if your oven runs hot. There's nothing worse than a dry corn muffin.)


Wednesday, November 26, 2008

SHRIMP AND SCALLOPS WITH GRITS


This recipe is a spin-off of one I found on epicurious.com, where it's rated 4 forks (highest rating). The original recipe is served at Slightly North of Broad Restaurant on East Bay Street in Charleston, SC, and they call it "Maverick Grits." I adapted it for the ingredients I had on hand, meaning that the chorizo was left out and the fresh tomatoes were replaced by canned diced tomatoes. I thought the grits would taste good cooked in chicken broth instead of water, and they did; but if I make this again, I'll use water and cream as the recipe calls for to get a milder, creamier taste that I think will perfectly complement the tomato base. I really liked this dish and will make it again. Another note: while stone-ground grits take forever to cook, they are so worth it. Using instant or quick-cooking varieties is not an option for me.
Shrimp and Scallops with Grits
Adapted from Maverick Grits, Slightly North of Broad, Charleston, SC and epicurious.com
Rating: 8 out of 10
INGREDIENTS:
For Grits: 1 cup water
1/8 tsp. sea salt
1-1/2 tsp. unsalted butter, divided use
1/4 cup stone-ground grits
1 Tbsp. heavy cream
For Seafood Sauce: 1/4 cup chopped ham
1 Tbsp. unsalted butter, divided use
4 medium sea scallops
6 large shrimp
1/2 cup diced tomatoes
2 Tbsp. sliced scallions
1/4 tsp. finely chopped or grated garlic
pinch of cajun seasoning, such as Emeril's essence
2 Tbsp. water
Bring water, salt and 1/2 tsp. butter to a boil in a 1-quart saucepan. Add grits. Cook at a bare simmer, covered, stirring frequently, until grits are tender and thick, about 1 hour. Stir in cream and remaining teaspoon butter and remove from heat.
Make topping 15 minutes before grits are done: Cook ham in 1-1/2 tsp. butter in a 9" heavy skillet over moderate heat, stirring, until ham is golden, about 2 minutes. Transfer ham to a plate with a slotted spoon. Add 1/2 tsp. butter to skillet and heat until foam subsides. Cook scallops until golden on both sides and just cooked through, about 2 minutes. Transfer to plate with ham. Add remaining 1/2 tsp. butter to skillet and cook shrimp, turning, until just cooked through, about 3 minutes. Stir in ham, scallops and remaining 1/2 tsp. butter, and remaining ingredients. Cook, stirring and scraping up any brown bits in skillet, until heated through, then season with salt and pepper. Serve topping over grits. Yield: 1-1/2 servings (Original recipe serves 4 generously.)

Tuesday, November 25, 2008

CHOCOLATE CHIP COOKIE EXPERIMENT #2: CHOCOLATE CHIPPERS WITH COCONUT FLOUR


For the second batch of coconut flour chocolate chippers, I wanted to see if I could get more of a cookie texture. So I used the Smart Balance 50/50 Butter Blend, upped the flours, eliminated the extra egg yolk, cut the milk to 3 Tbsp. and just slightly upped the sugar. These are more of a cookie texture, but they're still very big and fat, and they're wonderful! I baked these at 350F, instead of 375F, and I think that contributed to a better texture also, although they don't brown quite as much. There are some men around here who are clamoring for more. If I use all the coconut flour to make nothing but these chocolate chippers, they will be quite happy.

Chocolate Chip Cookie Experiment #2: Chocolate Chippers with Coconut Flour
Rating: 9.5 out of 10

INGREDIENTS:
1 stick (4 oz.) Smart Balance 50/50 Butter Blend, melted, cooled
3/4 cup brown sugar
1/3 cup sugar (I used 2 tsp. Stevia)
1 large egg
1 tsp. pure vanilla extract
1/2 tsp. coffee brandy or strong coffee
3 Tbsp. milk (I used fat-free H&H)
1-1/3 cup all-purpose flour
1/3 cup coconut flour
heaping 1/4 tsp. baking soda
heaping 1/4 tsp. sea salt
1 cup chocolate chips (I used 20 Hershey Blisses, chopped)
1/3 cup toasted broken walnuts

Preheat oven to 350F. In a large bowl, beat the sugars with the somewhat cooled butter till well combined. Use a whisk, not an electric mixer. Mixing cookies by hand makes a better cookie. Add the egg and whisk again till well combined. Stir in flavorings and milk. In a separate bowl, combine dry ingredients, chips and nuts and mix well. Add dry ingredients to wet and stir with a spatula till you can't see flour any more. Using an ice cream scoop (about 1/4 cup), drop dough onto a parchment-lined baking sheet, spacing several inches apart.


Bake for 12-15 minutes, or till a toothpick inserted near center returns with just a few crumbs. Cookies will be soft and will not be browned, but take them out any way and let them cool in the pan for 2 minutes before removing them to a wire rack to finish cooling. Yield: 11 big fat cookies

Monday, November 24, 2008

CHOCOLATE CHIP COOKIE EXPERIMENT #1 -- CHOCOLATE CHIPPERS WITH COCONUT FLOUR

On our last trip to New Jersey, I bought some Bob's Red Mill organic coconut flour. And now I have to find ways to use it. The idea of adding fiber to my baked goods interested me since I'm always trying to come up with ways to make sweets more healthful. So I thought I'd start experimenting with chocolate chip cookies. I worked off of the Cook's Illustrated Chewy and Thick Chocolate Chip Cookie recipe. I made the cookies oversized -- about 4 oz. of dough for each, and they didn't spread. They came out scone-like, kind of like the Levain copycat cookies. And that's after I squashed the dough down with a fork. You can't stop these guys from rising. I like these about as much as I like the Levains, although they're not crispy on the edges. Instead, they're more like a -- well, scone, like I said. I think I accidentally made a chocolate-chip scone. And did I say I like them? I like them a lot. You might not want to invest in coconut flour, but you should know that it's very good for you: high in fiber and protein, it's also gluten free. It can be used in smoothies; and you should also know that the coconut flour is so mild, it's hardly detectable. That's because it's made from coconut that first has the oil extracted out. Since most of the coconut flavor is in the oil, the remaining "flour" is almost tasteless. We all need to find ways to eat healthier, so consider joining me in my coconut flour experiments. There will be more coming. But back to these cookies -- ahem -- they're all gone -- didn't last long at all.

Chocolate Chippers with Coconut Flour (Experiment #1)
Rating: 9 out of 10
INGREDIENTS:
1 stick unsalted butter, melted, cooled
3/4 cup packed brown sugar
1/4 cup sugar (I used 1-1/2 tsp. Stevia)
1 large egg + 1 large yolk
1 tsp. pure vanilla extract
1/2 tsp. coffee brandy or strong brewed coffee
1/4 cup milk
1-1/4 cup + 2 Tbsp. flour
1/4 cup coconut flour
heaping 1/4 tsp. baking soda
heaping 1/4 tsp. sea salt
1 cup chocolate chips (I used 20 Hershey Blisses, chopped)
1/3 cup toasted broken walnuts

Preheat oven to 375F. Beat the sugar into the somewhat cooled butter till well combined. You can use a wire whisk for this. There is no need to get out your mixmaster, because the best cookies are made by hand, not by machine. Add the egg & yolk and continue to beat well for a minute or two. You need some exercise anyway, right? Now stir in the flavorings and milk. Combine the dry ingredients, chips and nuts in a separate bowl and mix them together well. Add them to the dry ingredients and mix lightly with a spatula till you can't see flour any more. But don't overmix, please.
Using an ice cream scoop (about 1/4 cup), drop balls of dough onto parchment-lined baking sheets, leaving a couple of inches between cookies. Bake for 10-12 minutes, or till a toothpick inserted near center returns with just a few crumbs. They won't seem done, but let the toothpick be your guide, because these are best when they are just a tad underdone, just like a scone, which is what they're like. Yield: 10 big fat cookies (or scones)
P. S. If you can't find organic coconut flour in your local stores, you can purchase it through Amazon using this link: Bob's Red Mill Organic Coconut Flour.

Sunday, November 23, 2008

A NEW AND INTERESTING BLOG

Are you interested in dry-aging beef? My hubby is, and he's been researching it. I did some of my own research on dry aging and, in the process, came across a great blog, The Alcoholian. There are some great recipes on the site, and it's quite unique. I'm adding a link to this blog so others can find it when they visit me, and I'll be surfing over there myself often. You won't find a lot of desserts, but you will find some very nice recipes and techniques.

Saturday, November 22, 2008

SIMPLE RASPBERRY VINAIGRETTE


This is a very simple, easy vinaigrette that goes especially well with a spinach salad, but could also be used for any greens. If you have any fresh or frozen raspberries to throw on top, it would be even better -- but don't worry, it's fine without them.
Simple Raspberry Vinaigrette
Source: Judy's Kitchen
INGREDIENTS:
3 Tbsp. seedless raspberry jam
3 Tbsp. raspberry balsamic vinegar
1/3 cup extra-virgin olive oil (use the good stuff for this)
1/8 tsp. onion powder
1/8 tsp. garlic powder
1/8 tsp. black pepper
1/4 tsp. sea salt
Microwave the jam in a small microwaveable dish, just till barely heated, about 10 seconds. Add remaining ingredients and whisk well till smooth. If you have any frozen or fresh raspberries to throw on top, great. If not, don't worry, this dressing is fine by itself. Refrigerate leftover vinaigrette and bring to room temperature before using.

SPINACH SALAD


I love roasted beets with spinach, but sometimes I just don't want to take the time to roast or cook the beets. Surprisingly, raw grated beets taste absolutely amazing with spinach. They're sweet, crisp and brighten up the bitter taste of the spinach. Some sliced raw mushrooms and a simple raspberry vinaigrette makes this an easy-to-prepare but very satisfying salad for everyday dining or for company.
Spinach Salad
Source: Judy's Kitchen
INGREDIENTS:
1 nice big handful of pre-washed baby spinach for each person
1 large or 2 small mushrooms, sliced thin, for each person
3 Tbsp. peeled, grated beets for each person
Optional: 1 Tbsp. toasted nuts of choice for each person
Prepare veggies, but don't mix the beets with the spinach until serving time because they will bleed too much. They'll bleed anyway, but not as much when you mix them right before serving. Drizzle salad with vinaigrette and top with nuts (if using).

Friday, November 21, 2008

COMFORT FOOD: MEATLOAF


When the weather turns cold, I love using the oven to cook meals. The kitchen feels warm and cozy and there's something about oven-cooked meals that's just comforting. Meatloaf is the ultimate guy comfort food, though. I'm still amazed at how men just go ga-ga over meatloaf. This is such an easy dinner. Just sprinkle your veggies around the meatloaf and you have your meal. You can quarter your potatoes (white, yellow or sweet), leaving skins on, or use the baby Yukon golds or fingerlings. Brussels sprouts or broccoli are both great roasted. Try quartered onions, baby carrots (or carrot chunks) or anything else that suits your fancy. Put them in about 20-25 minutes before the meatloaf is done. We're not gravy people, so I don't make a gravy for the meatloaf. This recipe makes a moist but firm loaf that slices easily for sandwiches the next day. And my whole-wheat-phobic hubby has not caught on that he's eating some turkey and whole grains in this meatloaf, in case you're thinking this might be too healthy tasting. You can use beef, pork and veal or beef and pork or all beef, if you'd rather.

Meatloaf
Source: Judy's Kitchen

INGREDIENTS:
2 Tbsp. olive oil
1 cup finely chopped sweet onion
2 Tbsp. finely chopped roasted red pepper (or fresh bell pepper, any color)
2 tsp. freshly grated garlic
3/4 cup shredded fresh whole-wheat bread (about 1 slice)
1/2 cup oats
1/2 cup milk or water
1 tsp. sea salt
1/4 tsp. black pepper
1/2 tsp. dry mustard
1/4 cup ketchup
1/4 cup chopped fresh parsley
1 large egg
1-3/4 lbs. ground meat (combo of beef, pork and 93% lean turkey)

GLAZE: 1 Tbsp. prepared mustard, 1/4 cup ketchup, 1 Tbsp. brown sugar

In large heavy skillet, saute the onion and pepper in oil over medium heat till transparent, about 5 minutes. Add garlic and saute briefly, about 30 seconds-1 minute. Remove from heat and cool.
Preheat oven to 350F. Spray a baking pan with non-stick cooking spray.
Add shredded bread, oats and milk to cooled skillet, stirring to combine all ingredients. Let sit for 5 minutes. Add remaining ingredients, including meat, and mix lightly but thoroughly till everything is well combined.
Form mixture into one or two loaves (I do two loaves and freeze one.) and place on the prepared pan. Mix glaze ingredients together and spoon over top of loaf. Place in preheated oven for 1-1/4 hours, or till thoroughly cooked (meat thermometer should register 165F, and meatloaf should rest for 10-15 minutes before serving.) During last 20 minutes, add any veggies you like: quartered or small potatoes, white or sweet; brussels sprouts, broccoli, carrots, zucchini, etc.

Tuesday, November 18, 2008

PEANUT BUTTER CUPCAKES


I'm on a cupcake tear, looking for ways to use up the rest of that wonderful chocolate sour cream frosting I just made.
What goes better than peanut butter and chocolate? I found a recipe on allrecipes.com and lowered the fat and sugar content somewhat, subbed whole wheat pastry flour for the all-purpose and added some coffee and cinnamon flavors. OMG are these good! They're very light, almost delicate, but they're also very moist and flavorful. Flavorings are absolutely perfect. The coffee and cinnamon are very subdued, but somehow they enhance the peanut butter flavor. You must try these, especially with the great sour cream chocolate frosting. I topped half of them with miniature Reese cups, cut in half horizontally and left the other half plain. These are 1 dozen cupcakes made in heaven. If I make them again, I'll add 1/4 cup more peanut butter because I think they'll be even better. One thing more: you can certainly use regular homogenized peanut butter with sugar added, instead of the natural which I used. It will be much easier to mix the batter using the homogenized. When you use the natural, it's heavier and doesn't mix as easily. This means you must spend some time scraping the bottom to be sure you have incorporated the peanut butter into the batter. If you opt to use the homogenized, sugar-added peanut butter, you might want to reduce the sugar by a few tablespoons, because they are sweet enough without extra sugar. Unless, of course, you are a sugarholic.
Peanut Butter Cupcakes
Rating: 8.5 out of 10
INGREDIENTS:
3/4 cup milk (I used fat-free H&H)
1 tsp. instant coffee granules (I used decaf)
1 tsp. pure vanilla extract
1 cup brown sugar (I used 3/4 c. brown sugar + 1 tsp. Stevia)
1 Tbsp. Smart Balance buttery spread, softened
generous 1/2 cup natural peanut butter, room temp (I used Smucker's natural creamy)
(Note: I would use 3/4 cup peanut butter for an even stronger peanut butter flavor.)
1 large egg
1-1/4 cups whole wheat pastry flour (or half whole wheat flour, half all-purpose flour)
1/2 tsp. baking soda
1 tsp. cream of tartar
1/2 tsp. cinnamon
Big pinch of sea salt
1/2 cup applesauce (I used no-sugar added applesauce)
Preheat oven to 350F. Line a 12-cup cupcake pan with paper liners. Pour milk into a measuring cup. Add coffee granules and vanilla and stir well; set aside.
In bowl of a stand mixer, using medium speed, beat together first 3 ingredients until light and fluffy. (If you are using natural peanut butter, it will not get light and fluffy.) Add egg and continue beating till well incorporated, scraping bottom and sides as necessary.
In a small bowl, combine flour, soda, cream of tartar, cinnamon and salt, mixing well. Add the dry mix to the peanut butter mix alternately with the milk mix. Be sure to scrape the bottom and sides of the bowl often to incorporate all of the peanut butter into the batter.
Divide batter evenly into the 12 cups, using about 1/4 cup batter for each. Bake for 15-20 minutes (mine took 18 minutes), until a wooden pick inserted near center returns with just a few crumbs. Transfer to wire rack to cool completely before frosting with your favorite frosting.

Monday, November 17, 2008

INA GARTEN'S PARMESAN-ROASTED BROCCOLI, ADAPTED


The thought of roasting broccoli was never an appealing one for me, until Ina did it. In late October, she was on Good Morning America, and this was one of her recipes. Her recipe feeds a crowd, and I just wanted to try a small amount, plus I wanted snap peas with the broccoli, so I adapted the recipe. The veggies are really great this way. I am a fan of roasting, since it intensifies the flavor of whatever you put in the oven -- and much to my amazement, it doesn't make the broccoli bitter at all. I left out the basil and pine nuts, only because I didn't have any, but I'm leaving them in the recipe below, because I'm sure they'd be wonderful in this dish. The only problem I have with the recipe is that if you put the garlic in with the veggies, you will wind up with burnt, bitter garlic. So IMHO, it's best to add the garlic to the hot veggies. I'm printing an adapted smaller batch recipe below. For the original version, click on the GMA link above.
Ina Garten's Parmesan-Roasted Broccoli, Adapted
Rating: 9.5 out of 10
INGREDIENTS:
1-1/2 cups of broccoli florets and 1 cup Sugar Snap Peas
2 Tbsp. + 1-1/2 Tbsp. Extra Virgin Olive Oil, divided use
1/2 tsp. sea salt
Big pinch black pepper
1/2 tsp. grated lemon zest
2 tsp. fresh lemon juice
2 tsp. chopped fresh basil leaves
2 garlic cloves, grated
1 Tbsp. toasted pine nuts
2 Tbsp. grated Parmesan cheese
Preheat oven to 425F. Place veggies on a baking pan in a single layer. Drizzle with 2 Tbsp. oil; sprinkle with salt and pepper. Roast 20-25 minutes, until crisp-tender, and tips of broccoli florets are browned.
While veggies are in the oven, prepare vinaigrette: In a small cup, combine remaining 1-1/2 Tbsp. oil with the grated garlic, lemon zest, lemon juice and basil.
Remove veggies from oven and immediately toss with vinaigrette, pine nuts and Parmesan cheese. Serve hot.

Friday, November 14, 2008

BETTY CROCKER'S OVEN-FRIED RANCH CHICKEN, ADAPTED


Betty Crocker's website is where I found this recipe. I thought the idea of baking the chicken in dry cornbread/muffin mix was a good one, since shortening is in the mix and, so I thought, would baste the chicken as it cooked. But I didn't have any mix. So I did some research on the internet and found a recipe for homemade cornbread/muffin mix. The chicken is just ok. And the reason for that is that I wanted fried chicken, and this doesn't taste like fried chicken. It tastes like chicken that's been oven fried with a coating. I remember the days of Shake 'n Bake. It tasted good, but it wasn't fried chicken. Well this is the same. Will I make it again? Probably not. When I want fried chicken, I'll order out.

Betty Crocker's Oven-Fried Ranch Chicken, Adapted
Rating: 5 out of 10
INGREDIENTS:
MARINADE: 1 cup buttermilk
1 package ranch dressing mix
1-1/2 lbs. chicken pieces
Cooking spray

BREADING:
1/2 pouch (half of 6.5 oz.) Betty Crocker cornbread mix (or 1 cup self-rising cornmeal + 2 Tbsp. sugar + 2 Tbsp. Smart Balance buttery spread)
1/2 tsp. smoked paprika
1/2 tsp. black pepper
1/2 tsp. seasoned salt
1/8 tsp. ground red pepper

1. In large resealable food-storage plastic bag, mix buttermilk, dressing mix and chicken pieces. Seal bag. Turn bag several times to coat chicken. Refrigerate at least 1 hour or overnight.
2. Heat oven to 425F. Spray a baking pan with cooking spray. In shallow dish, mix breading ingredients. (If using homemade cornbread mix, cut Smart Balance in dry ingredients until it resembles cornmeal.) Place chicken, bone-side down, in pan. Lightly spray top of chicken with cooking spray.
3. Bake 35-40 minutes, or till juice of chicken is clear when thickest piece is cut to bone (170F for breasts, 180F for thighs and drumsticks).

Thursday, November 13, 2008

CHOCOLATE SOUR CREAM FROSTING


This is About.com Diana Rattray's frosting recipe, and it's delicioso. She used semisweet chocolate chips, but I opted to use Nestle Chocolatier 62% cacao bittersweet chocolate baking bar, chopped. And I added some coffee syrup to bump up the flavors. This makes a thin frosting when warm, but once it cools, it sets up and becomes almost fudgelike. It's perfect for dark chocolate cupcakes. This recipe makes quite a bit, though. I frosted 12 cupcakes and had plenty left over. After frosting another 12 cupcakes, I still had frosting left over. I froze the last bit left over. Oh, and this would make a great chocolate drizzle.
Chocolate Sour Cream Frosting
Source: About.com
Rating: 9.5 out of 10
INGREDIENTS:
1 cup chopped bittersweet chocolate,
or semisweet chocolate chips
1/4 cup Smart Balance 50/50 blend, or butter
1/3 cup sour cream (lite is ok)
1 tsp. pure vanilla extract
1/2 tsp. strong coffee, coffee brandy, or coffee syrup*
1/4 tsp. sea salt
2-1/2 - 2-3/4 cups sifted confectioner's (10X) sugar
Melt chocolate with butter in top of double boiler over hot water. Remove from hot water; stir in sour cream, flavorings and salt. Slowly beat in 10X sugar until desired spreading consistency is reached. Makes enough chocolate sour cream frosting for a tube or bundt cake or 2-layer cake.
*Coffee Syrup: Measure 1/4 cup coffee brandy or liqueur in a small cup or jar. Add 2 Tbsp. instant coffee granules. Refrigerate and use as needed for coffee flavoring. Stir or shake before using.


SPECIAL DARK CHOCOLATE CUPCAKES


Diana Rattray, About.com is the source of this great cupcake recipe. The only thing I changed was to add a little coffee flavoring to complement the chocolate. You'll get a dozen standard-size cupcakes from this recipe, and you'll have a hard time keeping them around, especially if you frost them with chocolate sour cream frosting. These are nice and chocolatey, moist, flavorful and just super yummy. The recipe doesn't state which cocoa powder to use, probably meaning that natural was used. I opted to use Hershey's Special Dark, which is a combination of natural and Dutched cocoas. Although nothing can ever compare with the Chocolate Guinness Cake that I made last week, these are really, really good. But, be aware, these are the full Monty -- no shortcuts here to save calories or fat. Remember moderation -- if you can.

Special Dark Chocolate Cupcakes
Source: About.com
Rating: 9 out of 10
INGREDIENTS:
1/2 cup boiling water
1 tsp. instant coffee granules
1/4 cup Smart Balance Butter Blend or butter
1 cup sugar
1/4 cup Hershey's Special Dark cocoa
1-1/2 cups all-purpose flour
1/2 tsp. salt
1/2 tsp. baking powder
1/2 tsp. baking soda
1 large egg
1/2 cup sour cream (I used lite.)
1 tsp. pure vanilla extract
Preheat oven to 350F. Line a 12-cup cupcake tin with paper liners.
In the bowl of a stand mixer, combine boiling water, coffee granules, Smart Balance Butter Blend or butter, sugar and cocoa. Beat on low speed until sugar is dissolved. Add sifted dry
ingredients alternately with the beaten egg, sour cream and vanilla. Evenly distribute batter among 12 cupcake cups, filling each about 2/3 full.
Bake 17-22 minutes, or till a wooden pick inserted near center returns with just a
few crumbs. Frost with your favorite frosting. Yield: 12 standard size cupcakes.


/div>

Tuesday, November 11, 2008

WINTER SQUASHES SAUTEED WITH CRANBERRIES AND TOASTED PECANS


There is nothing more frustrating than trying to cut through a thick-skinned winter squash. I'm sure that fingers have been lost trying to penetrate the hard skin of a Golden Nugget or Buttercup squash. But I love the orange gems so much that I have to persist. And there are so many good recipes for squash, how can I not buy them? I must tell you, though, that I balk when a recipe says to cut the raw veggie into chunks or to peel it. I submit to you that it just can't be done. At least not by me. So I am going to give you an easier way. The way I just made this recipe, not the way it was written. And I still have all my fingers. And, BTW, this is a great recipe for squash. I just love that you can make it so many ways, and each way tastes great! Winter squash is one of my all-time faves. And it doesn't hurt that it's very good for you.
Winter Squashes Sauteed with Cranberries and Toasted Pecans
Source: The Sun Journal Newspaper, New Bern, NC
Rating: 8.5 out of 10
INGREDIENTS:
1 cup butternut squash (This is thin-skinned and can be peeled.)
1 cup acorn squash (This is thick-skinned and will take your fingers if you're not careful.)
1 cup pumpkin (This is very thick-skinned, so beware!)
1/4 cup pecans
1 Tbsp. dried cranberries
1/2 cup boiling water
1 cup vegetable or chicken broth
2 Tbsp. butter (or Smart Balance)
Juice of one lemon
Salt and Pepper as needed
Preheat oven to 400F. Using a sharp, heavy knife, cut squashes in half and scoop out membrane and seeds. Place squashes, cut side down on a large baking pan that has been sprayed with non-stick cooking spray. Place in oven, covered with tinfoil, and bake 40-45 minutes or till tender when pierced with a fork. Remove and let cool slightly. (Any leftover squash can be used later in the week or frozen. Remember that squash is a great fat substitute in baked goods.)
Lower oven heat to 300F. Place pecans on a shallow baking pan and toast about 10 minutes, or till slightly fragrant. Chop pecans. Set aside.
Combine cranberries with boiling water. Allow them to plump for 10-15 minutes. Drain; chop coarsely; set aside.
Bring broth to a boil over high heat in a skillet. Measure 1 cup pulp from each squash and add to broth. Cook till all liquid is absorbed, stirring occasionally, about 3-4 minutes. Add pecans, cranberries, butter, lemon juice and salt and pepper. Continue to cook another 2-3 minutes, stirring gently to distribute all of the ingredients evenly. Serve immediately. Yield: 4 servings
NOTE: If you want a smaller amount, you have some options: you can make the above recipe and freeze some for later use. Or you can make the adapted version below, that I made. I used Buttercup squash and Golden Nugget, and found that Buttercup has a stronger but pleasing flavor, while Golden Nugget is mild and delicious. The two went well together, but use whatever squashes please you, because they're all great.
SMALL BATCH RECIPE:
1 Buttercup squash
1 Golden Nugget squash
1-1/2 Tbsp. pecans
1 tsp. dried cranberries + 3 Tbsp. boiling water
1/3 cup chicken broth
2 tsp. Smart Balance
1 tsp. fresh lemon juice
Salt & Pepper to taste
Follow directions above. After using 1/2 cup of each squash, I had 1-1/4 cups roasted squash left over which I promptly froze and will use later. The above makes 2 servings, and is so yummy!


Monday, November 10, 2008

EASY CHICKEN VEGETABLE SOUP


Here's an easy and delicious recipe for homemade chicken vegetable soup. I've been making this soup for many years. You can make it with or without rice or noodles. We prefer it without. You can vary the veggies according to what you like or what you have on hand. But the tomatoes really make the soup special, so don't leave them out. You might think the ketchup is a weird ingredient, but it adds a special flavor. And you can make this soup with chicken, turkey or even beef if you want.
Easy Chicken Vegetable Soup
Rating: 9 out of 10
INGREDIENTS: 2 Tbsp. Smart Balance or olive oil
1 cup chopped onion
1/2 cup chopped celery
1 Tbsp. minced or grated garlic
1 quart + 14.5 oz. can low-sodium chicken broth
1 can (15 oz.) diced tomatoes with liquid
1/4 cup ketchup
2 Tbsp. chopped fresh parsley
2 bay leaves
1/2 tsp. dried oregano, crumbled
1/2 tsp. dried basil, crumbled
1 tsp. sea salt
1/2 tsp. black pepper
1 medium potato, with skin, cut in small chunks
1 cup fresh or frozen green beans
1 cup peas
2 ears fresh corn on the cob, scraped, or 1-1/4 cups frozen corn
3 cups chopped or shredded cooked chicken
Optional: 2 cups cooked noodles or rice
In a large Dutch oven or stockpot, over medium heat, saute the onions and celery in the Smart Balance until transparent. Add the garlic and saute for 1 more minute. Turn up the heat and add the broth, tomatoes, ketchup, herbs, salt and pepper stirring to combine. Add vegetables; cover pot; reduce heat to a simmer and cook 20-30 minutes or till veggies are just about tender. Add chicken and cook till vegetables are very tender. If using, add cooked noodles or rice during last few minutes, just to heat them through. Taste the soup for final seasoning, adding more salt and pepper if needed. This makes a large pot of soup, enough for a crowd. Last week, I served a small bowl each to 7 people and had more than a quart left over to eat for lunches during the week.

Saturday, November 8, 2008

SOUTHERN LIVING'S BEST-EVER APPLE PIE (DOUBLE APPLE PIE WITH CORNMEAL CRUST)


I'm always up for a new apple pie recipe, even though I think I've found the perfect apple pie. So when the September 2008 issue of Southern Living Magazine came, I clipped this recipe out and waited for a chance to make it. That chance came last Sunday, when we had dinner company. I served the pie warm, with ice cream and the caramel sauce, and it was good. But the next day, I ate some cold with cold caramel sauce, and it was spectacular. Don't ask me why. Conventional wisdom says that apple pie is better warm. But this apple pie is different. First off, the crust kind of disappears over the apples when it's warm. But when the pie is cold, the crust comes back. And the crust is not something you want to disappear from an apple pie, right? There were a few things I had to change because I didn't have the ingredients, and other things were changed because I didn't want to use the ingredients mentioned. I'm partial to Rome and Winesap apples. I've tried Granny Smith, and I don't like the way they hold up in pies, so I used a mixture of Rome and Winesap. Use the apples you like. The recipe calls for 4-1/2 lbs. of apples; I used 12 cups, which is slightly less, but it was plenty. I didn't have apple jelly, and I didn't want to buy some just for this pie, so I subbed Smucker's Simply Fruit, apricot. I added some apple juice concentrate because I like to use it with apples to intensify the flavor. I like to use tapioca in fruit pies when I can, instead of flour or cornstarch, so I subbed that. Because the tapioca chunks were not dissolved when the pie went into the oven, I couldn't use the apple juices to baste the crust or I would get tapioca chunks on top of the crust; so I used a little apple juice concentrate mixed with sugar to baste the top of the pie, and it worked just fine. And, lastly, I didn't have any brandy for the caramel sauce. I had Hazelnut liqueur, and took a chance on it. The caramel sauce was the bomb, even though I reduced the sugar by 1/2 cup. This is a great pie, one that I would make again. It's still not my fave, but it's darn good, especially with the caramel sauce. But instead of ice cream, try plain sour cream or creme fraiche, because, amazingly, the pie is quite sweet, even though there's not a ton of sugar in it. Someone commented that they could actually taste the apples. I had ice cream on my pie when it was warm Sunday night. The next day, I had a cold piece of leftover pie with plain sour cream on it and the caramel sauce, and it was better, not as sweet, and the sour cream really complemented everything very well. One last note: the biggest problem you'll encounter with this pie is keeping the crust from burning. When you pile up all those apples, the pie takes longer to bake, so you have to be careful to protect the crust. The recipe below is the original with notes on my changes.

Southern Living's Best-Ever Apple Pie
(Double Apple Pie with Cornmeal Crust)
Rating: 9 out of 10
INGREDIENTS:
CORNMEAL CRUST DOUGH: 2-1/3 cups all-purpose flour (scoop method)
1/4 cup whole-grain plain yellow cornmeal
2 Tbsp. sugar
3/4 tsp. sea salt
3/4 cup cold butter (1-1/2 sticks), cut into 1/2" pieces
1/4 cup chilled vegetable shortening, cut into 1/2" pieces
8-10 Tbsp. chilled apple cider (I used apple juice concentrate mixed with a little water)
1 Tbsp. of reserved apple juices + 1 tsp. sugar (or 1 Tbsp. apple juice concentrate + 1 tsp. sugar) for basting top of pie crust

PIE FILLING:
2-1/4 lb. Granny Smith apples
2-1/4 lb. Braeburn apples (I used 6 cups Rome + 6 cups Stayman Winesap)
1/4 cup all-purpose flour (I used 4 Tbsp. instant tapioca)
2 Tbsp. apple jelly (I used 3 Tbsp. Smucker's Simply Fruit, Apricot)
1 Tbsp. fresh lemon juice
1/2 tsp. ground cinnamon
3 Tbsp. frozen apple juice concentrate (MY ADDITION)
1/4 tsp. sea salt
1/4 tsp. ground nutmeg
1/3 cup sugar (I used 3/4 cup;everyone thought it was perfect; I thought it was sweet.)
1 Tbsp. butter, cut into pieces + 3 Tbsp. sugar for top of filling (I used 2 Tbsp. butter + 1/4 cup sugar)

BRANDY-CARAMEL SAUCE:
1 cup heavy cream (I used slightly less)
1-1/2 cups firmly packed brown sugar (I used 1 cup)
2 Tbsp. butter
2 Tbsp. brandy (I used Hazelnut liqueur)
1 tsp. vanilla extract

MAKE THE CRUST: Stir together first 4 ingredients in a large bowl. Cut butter and shortening into flour mixture with a pastry blender until mixture resembles small peas. Mound mixture on 1 side of bowl. Drizzle 1 Tbsp. cider along edge of mixture in bowl. Using a fork, gently toss a small amount of flour mixture into cider just until dry ingredients are moistened; move mixture to other side of bowl. Repeat procedure with remaining cider and flour mixture. Gently gather dough into two flat disks. Wrap in plastic wrap, and chill 1-24 hours. (My notes: This is a great method if you don't have a food processor. My Cuisinart 11-cup food processor has the highest rating for pastries, because the blades stop immediately when you lift up on the pulse button. So I put everything in the work bowl and gently and quickly pulsed with quick on/off motions, so as not to overwork the dough. The crust was very flaky, and this was less work.)

PREPARE THE PIE:
1. Preheat oven to 425F. Peel and core apples; cut into 1/2" thick wedges. (I cut into 1/4" slices, my preference.) Place apples in a large bowl. Stir in next 7 ingredients. Let stand 30 minutes, gently stirring occasionally. (I let my apples sit for 1 hour, stirring occasionally.)

2. Roll out 1 pie crust on a lightly floured piece of wax paper; sprinkle dough lightly with flour. Top with another sheet of wax paper. Roll dough to about 1/8" thickness, about 11" wide.

3. Remove and discard top sheet of wax paper. Starting at 1 edge of dough, wrap dough around rolling pin, separating dough from bottom sheet of wax paper as you roll. Discard bottom sheet of wax paper. Place rolling pin over a 9" glass pie plate, and unroll dough over pie plate. Gently press dough into pie plate.

4. Stir apple mixture; reserve 1 Tbsp. juices. (If using tapioca, do not reserve juices; instead use 1 Tbsp. apple juice concentrate + 1 tsp. sugar.) Spoon apples into crust, packing tightly and mounding in center. Pour remaining juices in bowl over apples. Sprinkle apples with 3 Tbsp. sugar; dot with butter.

5. Roll remaining Cornmeal Crust Dough disk as directed in Step 2 above, rolling dough to about 1/8" thickness (13" wide). Remove and discard wax paper, and place dough over filling; fold edges under, sealing to bottom crust, and crimp. Brush top of pie, excluding fluted edges, lightly with reserved juices from apples (or apple juice concentrate); sprinkle with 1 tsp. sugar. Place pie on a jelly-roll pan. Cut 4-5 slits in top of pie for steam to escape.

6. Bake at 425 on lower oven rack 15 minutes. Reduce oven temperature to 35F; transfer pie to middle oven rack, and bake 35 minutes. Cover loosely with aluminum foil to prevent excessive brownig, and bake 30 more minutes or until juices are thick and bubbly, crust is golden brown, and apples are tender when pierced with a long wooden pick through slits in crust. Remove to a wire rack. Cool 1-1/2 to 2 hours before serving. Serve with Brandy-Caramel Sauce.

MAKE BRANDY-CARAMEL SAUCE:
1. Bring heavy cream to a light boil in a large saucepan over medium heat, stirring occasionally. Add sugar and cook, stirring occasionally, 4-5 minutes, or till sugar is dissolved and mixture is smooth. (I cooked it for more like 10-15 minutes.)
2. Remove from heat, and stir in butter, brandy and vanilla. Let cool 10 minutes.
(You can store this in the fridge for up to 1 week. To reheat, let stand at room temperature 30 minutes. Place mixture in a microwave-safe bowl and microwave at high 1 minute, stirring after 30 seconds. But it's great cold!) Yield: about 2 cups

Friday, November 7, 2008

CHOCOLATE GUINNESS CAKE


We do love crab parties. That's me at the end of the table with apron on, picking crabs. It's so much fun, and makes for good conversation. Except it was too close to the election. One person was for Obama, the rest of us for McCain. Whew. Almost went into fisticuffs. Hope we can all stay friends now that it's over.
Guy loves setting the table for crabs with his special crab paper and his homemade crab plates. We'll have to wait till next year to do this again. And luckily, it's a non-election year.


We had a crab party Sunday night, to eat up the last of our crabs. It's not that the crabs are done, it's just that Guy's tired of setting and emptying the traps. And we've eaten our fill of crabs this year. Apple pie was the main dessert, and this was just a side experiment. Our neighbor/friend drinks Saranac Black & Tan and we always have some in our fridge for him. So instead of buying Guinness, which no one here drinks, I subbed the Saranac. I was all set to not not like this cake, because I'm not a beer drinker and could never quite adapt to the flavor. I decided to just try a bite so I could say I tasted it. And I ate the whole thing. It was absolutely delicious. Tender, moist, flavorful and delicious, not too sweet, just enough of everything. And there's no heavy beer taste. In fact, I couldn't taste the beer much at all. Just this wonderful chocolate flavor. The recipe I followed called for a cream cheese icing with heavy cream added. I added just a touch of melted chocolate to it, and it was yummy. Instead of making the batter in a springform pan, I decided to use my little ramekins, but there was still batter left over. So I used my 6-cup bundt pans and two of my 4-1/2" springform pans. End result: I got one 4-1/2" "layer cake," made with the two springform pan cakes; 2 little bundt cakes, and 4 individual cakes from the ramekins. These sizes are much more usable for me. The 4 ramekin cakes are gone and the others are in my freezer, all frosted and waiting to be thawed. This is definitely a cake I will make again. My thanks to grouprecipes.com for this wonderful recipe. I'm printing it below in its original form, because I followed it to a "T", except for the little bit of chocolate added to the frosting and except for the Saranac in place of the Guinness.

Chocolate Guinness Cake
Rating: 10 out of 10
INGREDIENTS:
CAKE: 1 cup Guinness (or other Stout)
1/2 cup + 2 Tbsp. butter
1/2 cup cocoa
2 cups superfine sugar (I used regular)
3/4 cup sour cream (I used lite)
2 eggs
1 Tbsp. vanilla extract
2 cups all-purpose flour
2-1/2 tsp. baking soda
FROSTING: 8 oz. cream cheese
1-1/4 cups powdered sugar
1/2 cup heavy cream
1. Preheat oven to 350F and grease and line with parchment paper a 9" springform pan.
2. Pour the Guinness into a large saucepan and add the sliced butter. Heat until the butter is melted and remove from the heat. Whisk in the cocoa and sugar. In a separate bowl, beat the sour cream with the eggs and vanilla. Add the sour cream mixture to the Guinness mixture in the saucepan. Finally, beat in the flour and baking soda.

3. Pour the batter into the prepared pan and bake for 45 minutes to an hour, checking with a toothpick for doneness. (My little pans took 20 minutes.) Cool completely in the pan on a wire rack.

4. For the frosting, beat the cream cheese and powdered sugar together until well combined and creamy. Add the cream and beat again until it's a spreadable consistency. (Slowly add the cream and beat well afterwards.) At first there seems like a lot of frosting for just the top of a 9" cake, but don't skimp! The idea is to frost the top of the cake until it resembles the frothy head of a pint of Guinness. It's quite dramatic and lovely. (Note: I admit I skimped by cutting the frosting recipe in half, and drama aside, it was enough frosting for me.)


Thursday, November 6, 2008

FRIED GREEN TOMATOES

Is there any food more Southern than fried green tomatoes? I still have mental images of Jessica Tandy gratefully accepting the fried green tomatoes brought to her in the nursing home in the movie by the same name. But here's my big question of the day: Why are all the good Southern dishes either fried or full of sugar? Could that explain why Southerners have such a high rate of heart disease? Come to think of it, maybe that explains the rampant obesity and diabetes, too, which are also linked to heart disease. Okay, so here's the million dollar question: If I'm so darn smart, why did I make these at all? Well, for one thing, maybe I've been living in the South too long (15 years). Or maybe it was this recipe that I clipped from the last Southern Living Magazine, sent in by Carolyne Fisher Wilbanks, Lake Toxaway, NC. It just looked too good to ignore. One of our local roadside stands has green tomatoes. Actually, all of their tomatoes start out as green tomatoes and ripen as they age. So I bought some of their green tomatoes, and in just a few days time they were quickly turning red, calling for quick action on my part. As you can see from the top photo, they actually look almost all red. But they were still quite firm, so I figured it would be okay. And it was. All I can say is, it's a good thing I wasn't born in the South. I'd probably weigh 300 lbs. by now. These fried tomatoes are so good, I could easily become addicted. And Carolyne's recipe is fast, easy and delicious, producing a nice crispy coating on the outside, with a tender, juicy tomato inside. And -- talking about questions -- I'm still wondering how a very firm, almost hard, tomato (which looked pretty juiceless when I sliced it) became a delicious, crispy morsel of juiciness after it was fried. But then, it's probably best not to deliberate on it too much. Thankfully, green tomatoes are not available year-round. Try some while you can, but please don't have them every night. Fried stuff will kill you. No kidding.

Fried Green Tomatoes
Rating: 10 out of 10
INGREDIENTS:
4 large green tomatoes
1-1/2 cups low-fat buttermilk
1 Tbsp. sea salt
1 tsp. black pepper
1 cup all-purpose flour
1 cup self-rising cornmeal
3 cups vegetable oil
Salt to taste

1. Cut tomatoes into 1/4-to 1/3"-thick slices; place in a shallow dish. Pour buttermilk over tomatoes. Sprinkle with salt and pepper.
2. Combine flour and cornmeal in a shallow dish or pieplate. Dredge tomato slices in flour mixture.
3. Fry tomatoes, in batches, in hot oil in a large cast-iron skillet over medium heat 3 minutes on each side or until golden. Drain on paper towels. Sprinkle with salt to taste. Yield: 6-8 servings

Note: I used one tomato, 1/3 cup buttermilk, 2 tsp. salt, 1/4 tsp. pepper, 1/4 cup bread flour, 1/4 cup SR cornmeal, 2/3 cup oil, and I got 2-3 servings.


Wednesday, November 5, 2008

CHUNKY MONKEY MUFFINS, ADAPTED


This was a "use-up-the almost rotten bananas"recipe, found on hubpages.com. I halved the recipe, and didn't realize until I just now read my notes that I inadvertently did not halve the butter. No wonder these were so good! But I'm sure they'll be just as good with the correct amount of butter. Usually I use a butter substitute: pumpkin, applesauce or bananas. This time, I decided to keep the butter in, but used the amount for the full recipe, instead of cutting it in half like the other ingredients. Mabe it was a Freudian slip. Anyway, these muffins are really good -- unbelievably moist, tender and delicate. They're good warm from the oven and they're also good cold. I added some cinnamon, Greek yogurt and a cinnamon-sugar topping and changed the crushed walnuts to toasted broken walnuts. And, of course, I added extra butter by mistake. I'm going to print the right amount of butter in the recipe below, though, just so you know. These are very yummy and worth making, especially if you're looking for a way to use up bananas that are turning browner by the day.
Chunky Monkey Muffins
Rating: 8 out of 10
INGREDIENTS:
3/4 cup all-purpose flour (or white whole wheat, or mixture of whole wheat and AP)
1/2 tsp. baking soda
1/2 tsp. baking powder
1/4 tsp. sea salt
1/4 tsp. cinnamon
1/4 cup dark chocolate chunks
1/4 cup toasted, broken walnuts
3 Tbsp. butter
3/4 cup smashed bananas (about 2 medium)
1/4 cup + 2 Tbsp. sugar
1/2 tsp. pure vanilla extract
1 egg
2 Tbsp. vanilla-flavored non-fat Greek-style yogurt
Topping: 1/4 tsp. cinnamon + 1 Tbsp. sugar

Preheat oven to 375F. Spray muffin tins with non-stick cooking spray. In a large bowl, combine flour, baking soda, baking powder, salt and cinnamon, whisking together till well combined. Stir in chocolate chunk and walnuts; set aside.

In a medium microwaveable bowl, melt the butter. Mix in the bananas, sugar, and vanilla, beating by hand till well combined. Whisk in the egg and yogurt and again beat till well combined. Add wet ingredients all at once to dry ingredients and stir till just barely combined. Fill 9 muffin cups 2/3 full. Sprinkle each muffin top with some of the cinnamon-sugar mixture.

Bake for 18-22 minutes, or till muffins test done (when a toothpick inserted near center, and not in chocolate, returns almost clean). Yield: 9 small muffins