Wednesday, October 31, 2007
GRILLED MARINATED SALMON
Grilled Marinated Salmon
INGREDIENTS: 1/4 cup honey
3 Tbsp. extra-virgin olive oil
2 Tbsp. cider vinegar
1 tsp. crushed fresh garlic
1-1/2 Tbsp. grated fresh ginger
1/4 cup fresh lemon juice
1/2 tsp. sea salt
2-3 fresh salmon fillets or steaks
DIRECTIONS: Mix all ingredients in a medium resealable plastic bag. Massage to combine well. Add fish and massage again to cover fish well. Refrigerate 5-10 minutes or up to 1 hour, no longer. Remove fish from marinade and place on hot grill (400-450 degrees F.) Depending on thickness, salmon should take no longer than about 8 minutes. It should be pink in center (rare) and will continue to cook as it stands. I like to spray a piece of aluminum foil with non-stick cooking spray and cook the salmon on that. Clean up is easier because the skin doesn't stick to the grill grates. However, as you can see, there are no appetizing grill marks when cooked this way. If you care about that, just grill the salmon, skin side up, for a minute or so or until a nice grill mark shows, then flip it over and put it on the tinfoil to finish cooking. Any leftover salmon makes a great lunch the next day (salmon salad, or green salad with salmon or salmon sandwich)
Sunday, October 28, 2007
OUR TRIP TO KNOXVILLE, TENNESSEE
Knoxville is an interesting city. Guy calls it a big little town. The population of the city was 173,890 in 2000. The county's population was 411,967 in 2006. It's an easy city to get around in because of the highway systems that have been designed to transport you easily from one part to the other, and the surrounding Great Smoky Mountains make for beautiful scenery. Knoxville is hilly, which is a stark contrast to the flat land of East Carolina. The abundance of hardwoods in red, gold and yellow foliage also made the town pretty. (East Carolina has an abundance of pine trees which just stay green all year.)
We arrived just in time for the big game: University of South Carolina (Gamecocks) were playing University of Tennessee (Volunteers). The University of Tennessee sports teams are called "Volunteers" or "Vols" and are extremely popular in the surrounding area -- so much so that the telephone area code for Knox County and 8 adjacent counties is 865 (VOL), and orange and white is everywhere, reminding me of a giant creamsicle. Our niece, Corey, is a junior at UT and hosted a pre-game party on Saturday night which we visited briefly. We had a great time -- everyone was on supercharge because of the game. I also had a full day shopping with my sister and we found some great bargains. It was like being let out of a cage since New Bern has zero shopping. Williams Sonoma, Bed Bath & Beyond, World Market and Cooks Corner were some of my favorite places. I got some pretty placemats and napkins, Nielsen Massey vanilla paste, saffron threads, celtic sea salt and even some 550 Levis, but then time ran out and we had to quit. There were so many more stores to cover, but no more time. I would move to Knoxville just for the shopping. I'll be posting some recipes once we're back home.
On the way back home, we visited Asheville, NC, another beautiful mountain town which reminded us of a Colorado resort town. Because Asheville sits up higher, the mountains are very visible just about all the time. So every where you go, you see these gorgeous mountains and the blue sky -- breathtaking. Downtown Asheville is a cross-section of Asheville life and the main drags (Broadway and Biltmore) are filled with bistros, sushi bars, assorted restaurants, art stores, and of course, the Mast General Store which has 5 or 6 locations in NC and even one in Knoxville at the Old Brewery. The Mast General Store is worth a visit. They have the old candy barrels filled with candy, and lots of interesting gadgets, memorabilia, kitchen items, and even clothing and shoes. We ate at the 1896 Restaurant, for lunch and dinner, and both meals were great! Very upscale food, well prepared with excellent service. Prices were fair. For lunch I had a tuna wrap that I don't think had a drop of mayo in it, but did have mango, avocado, sprouts, dried cherries and a sauce that had nice kick to it. It came with cream of vegetable soup that was really good. I heartily recommend this restaurant. We snuck a look at Biltmore Village, which was mostly closed (Sunday), but looked interesting. They are adding to it, and more construction is underway, even a new hotel. We'll try to go back there next time we hit Knoxville so we can finish touring this fascinating city.
Traveler's Tips: Knoxville's Best restaurant: Puleo's Grille -- 3 locations. Great prices, fantastic food. Puleo's is a traditional steak and seafood restaurant that has been blended with southern comfort and traditional Italian offerings. I could have ordered everything off the extensive menu -- it all sounded delicious. Each of us ordered something different and none of us was disappointed. Their Caesar salad is wonderful. We didn't get to try the Chocolate Lasagne because we were too stuffed, but it sure sounded great. I would love to move this restaurant to New Bern -- I'd be eating there every night.
Monday, October 22, 2007
CARAMEL CHOCOLATE STREUSEL MUFFINS
I saw this recipe on cookiemadness.net. as a coffeecake recipe. (The original recipe is on the Land of Lakes website.) Since I am on a muffin mission, I decided to make muffins with the recipe. Why not? Muffins are easier to work with. You can freeze muffins individually and take one out of the freezer on a whim, pop it in the microwave or sit it on the counter for 15 minutes, and you have a dessert/snack/sweet treat. A coffeecake would be a tad easier to make since you are only dealing with one single pan, but then what do you do with it if you are making it for yourself? Pig out on coffeecake? You could slice it into individual servings and freeze that way, but like I said, muffins are the perfect answer.
I didn't change anything in the recipe and I am so glad that I didn't. These muffins are absolutely delicious. The crumb is soft and delicate (thanks to the sour cream and no extra liquids), the flavorings are perfectly balanced, and the caramel sauce on top ties it all together. What a muffin! I was skeptical at first, because the streusel just didn't sound that good to me, especially with the cinnamon and chocolate chips together, a combination that I don't usually appreciate. Trust me, these are great and really worth making.
Caramel Chocolate Streusel Muffins
INGREDIENTS:
Streusel: 1/2 cup mini or 2/3 cup regular chocolate chips (I used 1/3 cup milk chocolate and
1/3 cup Hershey's Special Dark)
1/2 cup chopped pecans, toasted and cooled
1/4 cup sugar
1/2 teaspoon ground cinnamon
Muffin: 1/2 cup + 1 Tbsp. unsalted butter, melted and cooled slightly - divided use
1-1/2 cups unbleached all-purpose flour, aerated before measuring
3/4 cup sugar
1-1/4 tsp. baking powder
1/4 tsp. baking soda
1/4 tsp. salt
2 large eggs
1 tsp. pure vanilla extract
1 cup light sour cream
Drizzle: 3/4 cup caramel bits
2 Tbsp. Half and Half or milk
OR 3/4 cup purchased caramel sundae sauce
DIRECTIONS: Have all ingredients at room temperature before starting. Start oven at 350 degrees F and place chopped pecans in a pie tin and into the cold oven. Set timer on 8 minutes to check pecans. You only want them to give off their aroma, so don't leave them in too long, or they will turn bitter. Remove from oven and cool. (This is when everyone needs a granite countertop, because everything cools faster on them.) In medium mixing bowl, microwave butter on high for about 45 seconds, or just till almost melted. It will continue to melt after you remove from microwave. Take out 1 Tbsp. of the melted butter and put it into a small bowl for the topping. Turn oven to 500 degrees F. Prepare muffin tins by greasing and flouring or spray with flour-added non-stick cooking spray. For coated pans, spray lightly with non-stick cooking spray.
With fork, combine all streusel ingredients with the butter in small bowl. Set aside.
In large mixing bowl, whisk together flour, sugar, baking powder, baking soda, and salt until well combined. (To measure flour, spoon lightly into measuring cup after first aerating the flour with a whisk. Level off with knife or spatula.) Whisk the eggs into the now-cooled butter until everything is smooth. Add the sour cream and vanilla and whisk again till smooth. Make a well in the dry ingredients and add the lilquids all at once. This is not your normal muffin batter. It will be thick but light and spongy. Do not overmix. It's ok to have lumps and much better to underbeat muffin batter than to overbeat it.
Put about 2 Tbsp. batter into each of 12 muffin cups. Top with about 2 tsp. streusel, then about 2 Tbsp. more muffin batter, then 2 tsp. streusel. (It's best to do 12 at a time so you can see how much of each component is left to work with; i.e., if you do one complete muffin and get to #11 muffin and see that you have way to much stuff left, what do you do? So first, put the 2 Tbsp. batter into 12 cups, then put the 2 tsp. streusel on top of the 12, then put 2 Tbsp. more batter on top of streusel on the 12 cups. Now take an assessment. Do you have batter left over? Divvy it up among the 12 cups before you put the last batch of streusel on top.)
Place muffins in oven and immediately reduce heat to 350 degrees F. Bake for 14-17 minutes, or till toothpick inserted in center of muffin returns with just a few crumbs. Cool in pans for 5 minutes, then remove muffins to rack to finish cooling completely. Put a large baking pan underneath the cake rack to catch the caramel sauce drips. Cleaning the pan will be easier than cleaning up a sticky counter top.
Make caramel drizzle: In a 1-cup measuring cup (see photo below), microwave the caramel bits with the Half and Half just till it bubbles up. Remove and stir, stir, stir. If caramel bits are still too sticky, microwave once again till it bubbles. Stir, stir, stir. When sauce is smooth and easy to work with, drizzle over cooled muffins. If this sounds like too much work, just buy a jar of caramel sundae sauce. Microwave 3/4 cup till it bubbles once, stir and drizzle over the muffins.
Sunday, October 21, 2007
CARAMEL-PECAN MACCHIATO MUFFINS
Caramel-Pecan Macchiato Muffins
INGREDIENTS: 1/2 cup broken pecans
1/2 cup unsalted butter
2 cups all-purpose flour, aerated before measuring
3/4 cup sugar
1/2 tsp. sea salt
1 tsp. baking soda
2 tsp. baking powder
1 cup caramel bits
1 large egg + 1 large egg yolk
6 oz. container coffee yogurt
1/2 cup milk
2 Tbsp. instant coffee powder (I use Folger's Decaf)
2 Tbsp. coffee brandy (I use Samosa)
2 tsp. pure vanilla extract
DIRECTIONS: Have all ingredients at room temperature before you begin. Preheat oven to 350 degrees F. Toast pecans in pie plate for 5-7 minutes, till they give off their aroma. Watch them closely so they don't burn. Remove from oven and let cool. Microwave butter on high in a medium mixing bowl, for about 45 seconds - 1 minute, only till almost melted. Let butter continue to melt after you remove it. Prepare muffin tins by greasing and flouring or spraying with flour-added non-stick cooking spray. For coated pans, just spray with non-stick cooking spray. Raise oven heat to 500 degrees F.
Combine dry ingredients in large mixing bowl: flour, sugar, salt, baking soda, baking powder and 1/2 cup caramel bits. (Lightly spoon the flour into the measuring cup and level off with spatula or knife. Use a light hand with measuring.) Add the somewhat cooled pecans. Stir well with whisk till well combined.
In the medium bowl, whisk the egg and yolk into the somewhat cooled melted butter till smooth. Add the yogurt. Whisk again till smooth. Add the milk, coffee powder, brandy, and vanilla and whisk again till smooth. Make a well in dry ingredients and add liquids all at once, whisking till just barely combined. Batter will be thick, but light and spongy.
Put 1/4 cup batter into each of 14-16 muffin cups. Press remaining caramel bits into tops of muffins. Place muffins in oven and immediately reduce heat to 350. Bake for 15-17 minutes, or till toothpick inserted in center of muffins return with just a few crumbs. Cool in pan for 5 minutes, then remove muffins to rack to finish cooling completely.
Before serving, top each muffin with caramel sauce: Microwave 1/4 cup caramel bits with 1 Tbsp. Half and Half on high at 20 second intervals, stirring each time, till mixture bubbles up and softens. Add more Half and Half if needed to make a thin sauce. Drizzle over cooled muffins.
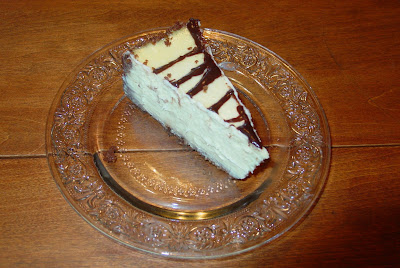
COCONUT CHEESECAKE, JUNIORS STYLE
I saw this recipe on cookiemadness.net food blog, but it was not coconut. The recipe called for heavy cream and I didn't have any, so I subbed cream of coconut, which I had. As long as I was subbing cream of coconut, I decided to add some coconut flavor to the filling and make a chocolate coconut crust. The original recipe calls for extra-large eggs, and all I had was large, so I used three instead of two.
Before I saw this recipe on Anna's food blog, I had never heard of Juniors cheesecake. A quick search of the internet turned up plenty of recipes for Juniors cheesecake. They have even put out their own cookbook with lots of different variations. Juniors is an Italian restaurant in Brooklyn and it seems the whole world knew about them and their famous cheesecake, except me of course. Anna says when you eat at Juniors, they give you a copy of their cheesecake recipe when you leave. How brilliant is that? How many people do you think are going to make this cheesecake? Probably less than 1%. But what a great way to keep your name and your product in the forefront.
My favorite cheesecake is Lindy's. It probably has fallen out of the public eye because the restaurant closed, like 30 years ago, so there's no one to promote the cheesecake any more. Juniors, on the other hand, is still going strong. That doesn't mean it isn't a good cheesecake. It definitely is. It has that dense, creamy, wet texture that everyone wants in a New York cheesecake. It's excellent cheesecake. In some ways, it's easier to make than Lindy's because of the crust. A graham cracker crust is always easier than a rolled cookie crust. But that's precisely what I like about Lindy's cheesecake -- the crust. That cookie crust is so nice and thin and perfect with the filling. Of course, the real Juniors cheesecake has a spongecake crust on the bottom only. Anna adapted the recipe and made a graham cracker crust and I thought it was a great idea. Maybe I should try making the original recipe, with spongecake crust before I vote on my #1 favorite. They certainly have a loyal following, so they must be doing something right.
Any way, back to the cheesecake. It only has a hint of coconut as you eat it, and that is mainly from the crust. If you are a coconut lover and would like a more pronounced coconut flavor in the filling, then you should increase the coconut extract accordingly. For me, it's fine as is; the vanilla comes through nicely -- I used Watkins Madagascar to get a nice flavor. (When I mentioned this to my sister, she said, "Yuk, Watkins." But as I explained to her, Watkins makes a pure vanilla extract and it's pretty good, and not a bad price at Wal-Mart. I don't buy imitation vanilla, ever, period. But I am starting to explore other vanillas and will probably do some kind of an experiment once I get them.)
Even though I processed the coconut heavily in the food processor, the crust is coconut-chewy. You will have to like coconut-chewy things to like this cheesecake. (You could also use 1-1/2 cups graham crackers and 1/2 cup coconut instead of 1 and 1 to make it less coconut-chewy. )
A word of caution about the foil wrap: don't skimp. I wrapped twice and I thought the cake was well protected. When I unwrapped the cake, there was water in the first layer, which totally surprised me. How did the water get in the bottom, when there were no seams on the sides? No water got into the bottom of the cake, thanks to the second wrap. If I make this again, I think I will do 3 wraps.
Discussion: Can you freeze cream cheese? Yes, but when it thaws it's grainy and you can't recapture the smooth texture. Well, when I unwrapped two blocks of the cream cheese, they must have been in the wrong spot in the fridge because they froze. Sure enough, when they thawed out, they were grainy. They tasted fine. I thought about it -- Ricotta and cottage cheese are both grainy and people make cheesecakes with them. What's the worse that could happen? The cheesecake wouldn't be as smooth as I like. I tried it. No problem. The cheesecake is smooth as butter. Now you know -- and so do I. You don't have to throw out frozen cream cheese. Just make a cheesecake with it.
Coconut Cheesecake, Juniors Style
INGREDIENTS: Crust: 1 cup graham cracker crumbs
1 cup coconut
2 Tbsp. cocoa
3 Tbsp. granulated sugar
3 Tbsp. butter
Filling: 4 8-oz. packages Neufchatel cheese or regular cream cheese (I used Neufchatel)
1-2/3 cups granulated sugar
3 large eggs
3/4 cup cream of coconut or coconut milk (not lite)
1/4 cup cornstarch
1 Tbsp. pure vanilla extract
1/4 tsp. coconut extract (increase to 1 tsp. for more coconut
flavor, if desired)
DIRECTIONS: Have all ingredients at room temperature before starting. Preheat the oven to 350 degrees F and generously butter or spray a 9" springform pan with non-stick cooking spray. In workbowl of food processor, combine crust ingredients. Pulse till well combined. Press crumbs onto bottom and 3/4 up sides of pan. Lay out 2-3 sheets of heavy duty foil. Set pan in center of top sheet. One at a time, bring each sheet of foil up and around the side of the pan, pressing tightly into the sides to make bottom waterproof. Here's what it looks like, ready to go into the oven:
Bake crust on center rack for 8-10 minutes. Remove from oven and cool. Heat about 1-1/2 quarts of water slowly on the stove. It will need to boil by the time you put the cheesecake into the oven.
Make filling: With damp paper towel, wipe out inside of food processor workbowl and combine 8 oz. cream cheese with the sugar, pulsing till smooth. Add remaining cream cheese, one block at a time, pulsing till smooth each time. Be sure there are no lumps before continuing. Add one egg at a time, pulsing till smooth after each addition. Add the cream of coconut or coconut milk and pulse again till smooth. Lastly, add the cornstarch, vanilla and coconut extracts and pulse briefly till combined. Carefully and slowly and gently pour the filling into the now-cooled crust. Set the foil-wrapped pan in a large shallow pan and add an inch of water. Don't add more than an inch or it may be difficult to remove the cheesecake pan. Bake the cheesecake until the center barely jiggles when you shake the pan. It's supposed to take 55 minutes to an hour, but mine took 1 hour 15 minutes. At the end of that time, the cheesecake didn't jiggle and I was worried I had left it in too long, but the texture was perfect.
Cool the cake on a wire rack for 1-2 hours, then refrigerate until it's completely cold -- at least 4 hours or overnight. Remove the sides of the springform pan and serve from pan bottom or transfer to a platter. Before serving, drizzle with chocolate coconut glaze (2 Tbsp. semi-sweet chocolate chips, 1 Tbsp. cream of coconut or coconut milk; in small cup or dish, microwave on high 20 seconds at a time, stirring often. Add more cream or milk as needed till mixture is thin enough to drizzle. Drizzle over cheesecake.)
Saturday, October 20, 2007
AVOCADO-PESTO SANDWICH SPREAD
We had London Broil two nights ago, and there was some left, so that was the main protein. (Chicken, turkey, salmon or roast pork would also be nice.) Tomatoes, lettuce, and roasted red peppers finished it out. It was a delicious sandwich, and I enjoyed every morsel.
Friday, October 19, 2007
HOLIDAY GINGERBREAD MUFFINS, adapted
Holiday Gingerbread Muffins, adapted from recipezaar #35184
INGREDIENTS:
1-1/2 cups whole wheat flour
1-1/2 cups all-purpose flour
3/4 cup sugar
1 Tbsp. lemon zest
2-1/2 tsp. baking soda
1/2 tsp. sea salt
1 tsp. cinnamon
1/4 tsp. cloves
1 Tbsp. ginger (or less if you don't like heavy spice)
1/4 tsp. nutmeg
1/4 tsp. allspice
2 large eggs
1/4 cup oil
1/2 cup applesauce
3/4 cup molasses
6 oz. lemon non-fat yogurt + water to make 1 cup
DIRECTIONS: Have all ingredients at room temperature before starting. Preheat oven to 450 degrees F. Grease and flour 18 muffin cups/tins or spray with flour added non-stick cooking spray.
In large mixing bowl, whisk together the dry ingredients and the lemon zest. In medium bowl, whisk the eggs, applesauce, oil, molasses, yogurt and water.
Make a wel in the dry ingredients and add the liquids all at once, whisking as little as possible till just barely combined. Batter should be lumpy. Fill the muffin cups with 1/4 cup batter. It should come almost to the top, but not over.
Gently fold both mixtures together till well combined and smooth. Serve dollops alongside muffins, or scoop the tops of the muffins out, fill with lemon cream and put tops back on.
Thursday, October 18, 2007
THIN SPAGHETTI WITH WHITE CLAM SAUCE (Vermicelli Alle Vongole in Bianco)
Wednesday, October 17, 2007
POMEGRANATE-RASPBERRY BALSAMIC SALAD DRESSING
When we lived in Long Valley, New Jersey, we had a huge vegetable garden. I mean really huge. We even grew our own corn. There is just nothing like fresh organic vegetables from your own garden. Now that we are in North Carolina, in a development where the homes are close together and governed by covenants and restrictions, we couldn't have a vegetable garden even if we could grow anything in the hot Carolina sun and swampy ground. So this year, we decided to try container gardening. And it's been working. This is our second batch of lettuce (top photo). When the summer arrived, the lettuce burned up. But now it's a bit cooler and it's growing again. Seed packets are cheap at Wal-Mart, about $1.00 for a pack of lettuce seeds that will last for several sowings. It comes up fast and you're eating it about 4 weeks after you plant it. Not bad, huh? The bottom photo is radishes. So now that I have the makings of a salad, I want to share a salad dressing with you that I made up. I really like it and it's very quick and easy.
(P. S. Here's a news flash! There is a new product out -- just saw it today at our local Harris Teeter. Regina, the people who make the Raspberry Balsamic Vinegar, now make Pomegranate Balsamic Vinegar. I won't be buying it for a while because I just stocked up on the Raspberry. It's on sale, and now I know why. Oh well, it's really, really good.)
Pomegranate-Raspberry Balsamic Salad Dressing
INGREDIENTS: 1/4 cup extra-virgin olive oil (I like Carapelli's)
1/4 cup Raspberry Balsamic vinegar
1/4 cup Pomegranate juice (you can use the combos--blueberry/pomegranate,pomegranate/cherry, etc., just be sure you get real juice, no sugar added)
1/2 tsp. sea salt (it has minerals)
1/8 tsp. black pepper
1/4 tsp. garlic powder
1/8 tsp. mustard powder (optional)
DIRECTIONS: Combine all ingredients in small bowl or jar with lid. Whisk or shake till mixed. Spoon or drizzle over greens.
Tuesday, October 16, 2007
OUR GARAGE SALE
The bake sale went well. I had this mental image that people would come in and say something like, "I've been waiting for this bake sale for so long and I just have to have your wonderful baked goods." Instead they hemmed and hawed and finally bought something. So it went in pieces, a little here a little there, but it all went. No one raved and said they died and went to heaven when they took a bite, but they paid their money and took their cookie or muffin. By 12:00 I was sold out. I hope they were all happy, and I may never know. No one has called me and said, "Wow what a great muffin (or cookie), I just have to have more."
I am happy that I can bake again now that there's room in the freezer. But I'm still getting over the garage sale. When adrenalin rushes the way mine did, the drop is pretty severe afterwards. In addition, I'm in the planning stages for a trip to Tennessee next week to see my sister and brother-in-law. We'll be going to Reidsville first, to see our son, then on to Knoxville, then to Asheville and back home. So as soon as I can get back to normal (whatever that is), I will get back in the kitchen and come up with some new recipes. Oh, and most of the garage sale items sold also. So, all in all, we're pretty happy to have an empty attic, empty freezer and a little extra cash for our trip.
Monday, October 15, 2007
ROASTED PEPPERS, ETC.
Peppers are a part of Guy's Italian heritage, and I have learned to love them, especially when they're roasted. This year, we decided to grow container peppers. In various garden pots, we tried paprika, Cubanelle peppers, green and red bell peppers and an Italian variety for which Guy paid $10.00 for a packet of seeds.
My heritage is Hungarian, and about 20 years ago, my mother brought her last remaining relative to the US to visit. Rosjie (my Hungarian relative), my mother and younger sister all stayed with us for 2 weeks. Rosjie cooked us real Hungarian Paprikash. She brought the paprika from Hungary -- it was almost black -- and told us that the reddish-brown paprika we get here is what they reject. They keep the good stuff for themselves. She used 1 lb. of lard and 2 lbs. of sour cream to make the paprikash and the spaetzles. Talk about a heart attack on a plate, but was it good! I always thought that Hungarians had the corner on paprika, but now it is emerging from other parts of the world.
Recently, I purchased a paprika plant at one of our local nurseries. It has been amazingly prolific. You can see it above -- the plant on the bottom step with the two red peppers. We put the red plastic over the soil of each pot because it is supposed to increase the yield, according to scientific studies. It must have done something for the paprika because it just wouldn't quit. We have taken at least 25 peppers off that little plant so far. The leaves of the plant curled up a few weeks ago, and we thought the plant was dying. Next time we looked, there were new leaves sprouting and there are more paprikas coming! When the paprikas are nice and ripe, we take them off and then string them in our hot attic to dry them out. Then we crush them in the food processor. (BTW, paprikas come in two varieties: sweet and hot. Our plant is hot.)
We love to roast the sweet peppers. If you've never had fresh roasted sweet peppers, you are in for a treat. They are so darned easy to make, you shouldn't deprive yourself of this treat. They're wonderful on sandwiches, as an accompaniment to meat or chicken or as a salad with asparagus or other roasted veggies. Here is an easy recipe for roasted red peppers:
Roasted Red Peppers
1 red sweet bell pepper
Wash pepper, dry. Place under broiler or on a hot grill. When you see the pepper charring, turn it to char the other sides. After the entire pepper is charred all around, remove it and place it in a paper bag that you close or in a bowl with plastic wrap over it. Let it sit for about 10-15 minutes. Take pepper out and peel the skin with a knife. It should peel easily. Cut the pepper top off and pour out juice. Cut the pepper in half and remove seeds and membrane. Cut into several pieces or strips, as you prefer, and place in small container.
Leave it plain or add the following optional ingredients:
Mix together. Chill or serve immediately.
Friday, October 12, 2007
COCONUT CHICKEN FINGERS
Coconut Chicken Fingers
Adapted from Kraft Foods
1 chicken breast, skinned and boneless, cut into 1" strips
1 Tbsp. orange marmalade
Thursday, October 11, 2007
EASY POTATO SOUP
- Remove the cover and mash with a potato masher.
- Put contents of pan into blender or food processor and blend smooth.
I prefer method #1 because I like little pieces of vegetable in my soup, and because I don't care to fuss enough to make a smooth soup.
After you do either #1 or #2 above, add the parsley, milk and cheese (if you are using cheese) to the soup and heat till hot, but not boiling. Yield: 4 servings.
You will note in the photo above that the milk is not added to the soup in the jar. Neither is the cheese. We will have the remainder of the soup tomorrow night and I will reheat the soup, and add parsley, cheese and milk at that time. This soup also freezes well if you can keep it around that long. The colder it is outside, the better this tastes.
Also note: Land-of-Lakes FF H&H is the only fat-free half and half that I know of that won't curdle when you heat it, and that is why I recommend it.
COCONUT-WALNUT CHOCOLATE CHIP COOKIES
Adapted from myrecipes.com
Rating: 8.5 out of 10
1 cup sweetened flaked coconut
2 cups unbleached all-purpose flour
3/4 cup unbleached whole-wheat flour or white whole wheat flour
1 tsp. baking soda
1/2 tsp. baking powder
1/2 tsp. kosher or sea salt
1/2 cup unsalted butter + 1/2 cup Smart Balance buttery spread (or use 1 cup butter)
1-1/4 cups sugar
1-1/2 tsp. dark unsulphured molasses
2 large eggs
1 tsp. lemon juice
2 tsp. pure vanilla extract
1-1/2 cups your choice of chocolate chips
DIRECTIONS: Have all ingredients at room temperature before you start. Preheat oven to 375 degrees F. To toast the coconut and walnuts, spread each out onto a separate pie plate. Toast in the oven until they're golden and give off a nice aroma. You can put them in the oven when you turn it on, in which case they should take between 10-13 minutes. The walnuts
may get done first, and you can remove them. The coconut will start to brown on the edges first. When you see that happening, take the pan out of the oven and stir it, distributing the coconut so that the browned pieces are more in the center, if you can. I like to get the coconut good and brown, but you have to be careful you don't burn it, so watch it very carefully when it starts to turn. Set nuts and coconut aside to cool.
Measure the dry ingredients (flours, baking soda, baking powder, salt) in a medium-sized bowl and whisk to combine. Set aside.
In a large mixing bowl, cream the butter & Smart Balance with an electric mixer (preferably a stand mixer with a paddle attachment, only because it makes your job so much easier). Slowly add sugar and molasses and continue to beat until mixture is fluffy and light in color. (I goofed when I was making this batter and inadvertently combined the sugar with the flours. It didn't change anything in the finished product.) Add the eggs and beat till incorporated. Add the lemon juice and vanilla and beat 3 more minutes or until creamy textured. (If using mixer with paddle, you will beat for less time and you may notice the mixture curdling. It won't hurt anything.) By hand (or if using mixer with paddle, then by machine), stir in flour mixture until just barely mixed; gently fold in the chocolate chips, toasted coconut and walnuts. Chill batter for at least 1/2 hour for easier handling and so the cookies will set up better.
When ready to bake, preheat oven to 375 again. Prepare baking sheets with parchment paper. Drop cookie dough by rounded tablespoonfuls onto parchment paper, 2 inches apart. Bake in upper part of the oven (meaning put your oven rack at the mid-point or slightly above)
for 11-13 minutes, or until lightly browned, turning the baking sheet around half-way through the baking time to allow even baking of the cookies. (I like to test my cookies for doneness the same way you test a cake -- with a toothpick inserted in center. They'll be best if there are a few crumbs on the toothpick when you pull it out.) Let cookies cool in pan for 2 minutes before removing them to a wire rack to finish cooling. The yield on this recipe was quoted as 48, but I only got 42. Maybe I made bigger cookies.
Tuesday, October 9, 2007
CHOCOLATE LOVERS MUFFINS
Monday, October 8, 2007
LIMONCELLO BERRY MUFFINS
I didn't like these muffins when I first tasted them warm from the oven. But after they sat a bit, they improved and are really good, even if they look anemic. The topping is especially good. The lemon-nut-sugar crunch is the introduction to the light lemony muffin with the plumped berries that have been soaked in Limoncello. However, I did put ginger in the batter and I can't taste it at all. Maybe that's good because I think there's enough going on. I will leave the ginger out next time and put more lemon zest in. Even though I really like these muffins, I think they will be even better with 2 eggs instead of 3, 1 Tbsp. more lemon zest and a little less baking powder and soda. (If you don't want to use 1-1/2 cups of sour cream, you can substitute 1 cup of low-fat milk for part of the sour cream, and you should still get a nice muffin. Another option would be to use a 6-oz. container of lemon yogurt plus enough milk to make 1-1/2 cups. I used all sour cream because I had a carton in my fridge nearing expiration date; otherwise I would have used the lemon yogurt/milk combo) My changes are reflected in the recipe below.
INGREDIENTS: 1 cup dried mixed berries
1/2 cup Limoncello (see my post on homemade Limoncello)
1/2 cup butter
3 cups all-purpose flour + 1/4 cup for berries
1 cup sugar
4 Tbsp. lemon zest
1 tsp. baking powder
1 tsp. baking soda
1/4 tsp. salt
2 large eggs
1-1/2 cups sour cream (I used Breakstone low-fat)
1 tsp. pure vanilla extract
1 tsp. pure lemon extract
1/2 tsp. pure orange extract
Topping: 1 Tbsp. lemon zest
4 Tbsp. sugar
3 Tbsp. chopped walnuts
DIRECTIONS: Heat the Limoncello in a 1-quart saucepan till it boils. Add the berries, cover the pot and remove from heat. Let the berries plump for at least 1/2 hour or longer. After the berries are plumped and have absorbed half the Limoncello, put them in a strainer over a bowl or measuring cup to drain them and separate them from the Limoncello-berry juice. Melt the butter in the microwave on high in a medium-sized bowl (about 30-40 seconds -- it does not have to be completely melted, as small bits of butter will continue to melt after you remove the bowl from the oven.) Prepare the muffin pans for baking by greasing and flouring them or spraying them with flour-added non-stick cooking spray. Set aside. Preheat oven to 500 degrees F. Have all ingredients at room temperature before mixing.
Measure the dry ingredients, including the lemon zest, into a large mixing bowl and whisk together well to combine. Remember you have lemon zest in there, so be sure to whisk well so that you don't get clumps of lemon zest in your muffins! (Measure the flour by first aerating it with the whisk and then lightly spooning into measuring cup and using a spatula to level off cup.) Take the now drained but still wet berries and toss them with 1/4 cup flour -- just put everything in a plastic baggie and smoosh them around till they absorb all the flour.
The butter should not be blistering hot now -- warm is ok -- and you can whisk the eggs into the butter, one at a time, till everything is smooth. Add the Limoncello-berry liquid, whisk again; then add the sour cream, vanilla, lemon and orange flavors and and whisk till no lumps remain. Make a well in the dry ingredients and add the liquids all at once. Give a few good whisks -- don't try to get all the lumps out. Add the berries and gently whisk once. Place 1/4 cup batter in each of the prepared muffin wells (less if you are using mini muffin tins of course). Make a topping by combining lemon zest, chopped nuts and sugar. Top each muffin with about 1/2 tsp. of the mix. Place pans in oven and immediately reduce heat to 375 degrees F. Bake for about 13-15 minutes for dark or coated pans and 17-19 minutes for shiny pans. Mini muffin tins will take less time. Use a toothpick test to be sure muffins are done. Insert in center -- if it comes out almost clean, they are done. Let cool in pans for 5 minutes, then they should release easily. Finish cooling on rack. Yield: 18 muffins
Sunday, October 7, 2007
LOW-FAT PUMPKIN SPICE RUM-RAISIN MUFFINS WITH RUM-SPICE GLAZE
These are incredibly light muffins with really good flavor. Rum and raisins add something special to this muffin -- and the glaze is a perfect complement. Although I used freshly roasted butternut squash, you could easily use canned pumpkin and they will be just as good. Here's an added bonus: this recipe only uses 3 Tbsp. oil, so it's fairly low-fat. There's another 1 Tbsp. fat in the glaze, but comparatively speaking that's pretty good. Gourmet Magazine's recipe uses 2/3 cup oil.
Inspired by Gourmet Magazine
Rating: 9.0 out of 10
Click for PRINTABLE PAGE
1 cup raisins
3 cups unbleached all-purpose flour, whisked, then lightly spooned and leveled
2 cups white sugar, minus 2 Tbsp.
2 tsp. baking soda
1/2 tsp. baking powder
4 tsp. pumpkin pie spice
Preheat oven to 450 degrees F. Prepare two 12-cup muffin tins by greasing and flouring, or use flour-added non-stick cooking spray.
Make a well in the dry ingredients and add the liquids all at once. Carefully mix with spoon or spatula till barely combined. Toss the drained raisins in the 1/4 cup flour. (I put everything in a plastic bag and shook it till all raisins were coated.) Add the coated raisins and remaining flour and give it a quick stir. Fill each muffin well with about 1/4 cup batter. Place in oven and immediately reduce heat to 350 degrees F. Bake for 16-19 minutes. Muffins are done when a wooden pick inserted near center returns almost clean. Place pans on counter to cool for 5 minutes. Transfer muffins to wire rack to finish cooling.
While muffins are cooling, prepare glaze: Heat rum and butter on high in small bowl in microwave till butter is almost melted, about 35-40 seconds. Stir till butter is dissolved. Add pumpkin pie spice and 10X sugar and whisk together. Drizzle over muffins. Yield: 24 standard-size muffins
Saturday, October 6, 2007
CAPPUCCINO MUFFINS (adapted from recipezaar.com)
INGREDIENTS: 3/4 cup unsalted butter (1-1/2 sticks)
BISQUICK CAPPUCCINO CHOCOLATE CHIP MUFFINS
Bisquick Cappuccino Chocolate Chip Muffins
INGREDIENTS: 3 Tbsp unsalted butter
2-3/4 cups Bisquick
1/2 cup sugar
1/2 tsp. cinnamon
1 large egg
6 oz. container fat-free vanilla yogurt + enough milk to make 1-1/4 cups
1 Tbsp. molasses
1/2 tsp. pure vanilla extract
1 Tbsp. instant coffee granules (decaf is ok) OR instant Espresso powder
2 Tbsp. coffee brandy (such as Kahlua)
3/4 cup mixed chocolate chips (I used Hershey's Special Dark + Hershey's milk chocolate,
but any mix of chocolate chips is fine, whatever you like
DIRECTIONS: Have all ingredients at room temperature before starting. Preheat oven to 500 degrees F. Prepare muffin tins by greasing, then coating with flour (or use the flour-added non-stick cooking spray). Set aside.
Microwave butter on high in medium-sized bowl till almost melted (about 45 seconds). Measure dry ingredients into large bowl. (Note: Spoon flour lightly into measuring cup after first whisking the flour to aerate it. Muffins need a light hand, not only in the mixing, but also in the measuring. You will be rewarded with light, delicious muffins.) Whisk the dry ingredients together till well combined. Set aside. To the now-somewhat-cooled butter (it should be warm, not blistering hot or it will cook the eggs), add the egg and whisk for a few minutes till mixture gets a little frothy. Add the rest of the liquid ingredients and the coffee granules and whisk again till everything is smooth, a couple of minutes. Be sure you get the lumps of yogurt smoothed out and mixed well. Now make a well in your dry ingredients and add the liquids all at once, but only whisk enough to barely combine. It can be lumpy and it's ok if you can see some flour. It should only take a couple of turns with the whisk. Add the chocolate chips and barely stir them in. Fill each well of the muffin tin with 1/4 cup batter. You should have enough for 12 muffins. Place in oven and immediately reduce the temperature to 400 for shiny pans, 375 for dark and coated pans. Bake for 14-17 minutes, testing at 14 minutes. A toothpick inserted in center should come out almost clean. Remove pan from oven and let muffins cool in pan for 5 minutes. They should easily release after 5 minutes. Continue cooling them on a wire rack till completely cooled. They are wonderful warm and also good at room temperature. Any muffins you are not going to eat right away would best be frozen. Yield: 12 muffins
Friday, October 5, 2007
ROASTED PUMPKIN & BUTTERNUT SQUASH
Thursday, October 4, 2007
BAKED BREADED PORK CHOPS
Baked Breaded Pork Chops
2 center-cut thick pork chops
4 tsp. Lipton Garlic Mushroom soup mix (try to keep big pieces of mushrooms out)
1/2 cup biscuit mix or all-purpose flour
1 medium or large egg mixed with 1/4 cup chicken broth or water
1/4 cup Seasoned Italian bread crumbs
1/4 cup Panko (Japanese bread crumbs)
1/4 cup grated Parmesan cheese
4 Tbsp. extra-virgin olive oil
optional: sliced fresh mushrooms
optional gravy: 1/2 cup water mixed with 1 Tbsp. soup mix
Rinse chops. Pat dry with paper towel. Spread 1 tsp. soup mix on each side of chops. Press the mix onto the chops with your fingers. Dredge chops in biscuit mix or flour, shaking off excess. Dip chops into beaten egg & liquid, then into the breadcrumbs and cheese that have been mixed together. (If you don't have Panko, then just use all Italian bread crumbs mixed with the Parmesan Cheese. You can buy the crumbs with the cheese already in them, but I just like adding my own.) Put 4 Tbsp. oil in large fry pan and heat to medium-high. Add chops and brown about 5 minutes on each side. Check carefully for smoke -- do not burn chops. (If you are adding the mushrooms, put them in the pan with the chops so they can give off their liquid. Otherwise, if you add them to the baking pan, the liquid from the mushrooms will soften the breading.) Put chops in baking dish (for 2 chops, I used a 10-inch deep dish pie plate) sprayed with non-stick cooking spray and bake in oven, covered with tinfoil, at 350 degrees for 30-35 minutes, or until an instant-read thermometer registers about 155 degrees. Let chops sit on counter in pan for 5-10 minutes to continue cooking while you get the rest of the dinner ready. When you put chops in oven, prepare optional gravy if desired: Mix water and soup mix in 1 quart pot and cook at a low boil for the time chops cook. If desired, add sliced mushrooms to gravy. Yield: 2 servings
For 4 servings, double everything except the egg/liquid mixture.