Wednesday, June 30, 2010

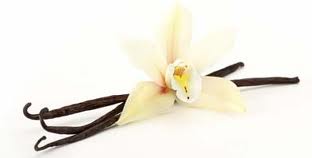
HOMEMADE VANILLA EXTRACT AND VANILLA POWDER


Last year I ordered vanilla beans and vanilla powder from Beanilla Trading Company.  I had read good reports about this company’s products and services, and I was not disappointed.  My order arrived quickly, and the packaging was high-quality.  The vanilla beans have been stellar, with generous amounts of “caviar” in each bean.  Beanilla’s prices are good, too, especially for the quality.  I’ll be ordering from them again, to be sure.  (Please note that I am not being compensated in any way for this endorsement.  In fact, Beanilla is totally unaware of it.)


One of the reasons I wanted to order vanilla beans was so that I could make my own extract.  It’s not a hard thing to do, it’s just time consuming.  Six months of time to be exact.  That’s how long the beans must soak in alcohol for the full flavor to be extracted. 

Here are the jars when they were first filled:011

Here are the jars after 6 months:
031

You can see that I recycled a green wine vinegar jar, a brown jar and a clear jar.  They were all thoroughly washed and rinsed, then sterilized, before using.  You can also buy colored glass or clear glass jars from Beanilla.  If you really want to make life simple, just open a new bottle of vodka and slip your spliced vanilla beans right into that, using 1 oz., or about 3, beans for every 8 oz. of vodka.  You’ll have  a ton of vanilla extract, but, really, what great Christmas gifts they would make.   Just buy or recycle smaller bottles for gift giving. 

P. S.  Several readers have asked which mixture I preferred.  Unfortunately, novice me should have used one type bean in 3 different alcohols.  Because I didn't do that, I can't really say which bean I prefer.  But I can say that the bourbon vanilla beans soaked in Barbados rum were by far my favorite mixture.  I also, at a later date, purchased Tonga beans, but was underimpressed with those.


Homemade Vanilla Extract
Source:  Unknown


For each batch, you will need:
1 10 oz. jar with lid, preferably dark green or brown glass
8 oz. vodka, bourbon or rum
1 oz. vanilla beans (about 3, depending on size)

Wash each jar  thoroughly with hot soapy water and rinse well.  Sterilize by steaming or boiling in water, along with the knife you will use to cut the vanilla beans open.  Cool on wire rack with bottles and caps  turned upside down to drain.

Label jars or caps with date.  

Pour 8 oz. of preferred alcohol in each bottle.  Cut each bean right down the middle to expose seeds.  You don’t need to scrape the seeds out.
010

(If preferred, you can cut the beans in smaller pieces to make it easier to cover them with the alcohol.)
008

Place beans in jar, being sure they are completely covered with liquid – no bean pieces should show above the alcohol.  Cap.  Shake. Shake vigorously every day or at least once a week.  If you forget, don’t  worry.  Just shake the jar(s) as often as you remember.  This shakes the seeds free, and helps to flavor the alcohol. 

You can start using your extract after 2 months, but the best flavor will be developed after 6 months.  Like a fine wine, it  will improve with age.  Shake the bottle before measuring out your extract, and be sure to store in a cool, dry place away from sun, light and heat.  As you use the vanilla, you can replace what you’ve  used with more alcohol.  Initially, it will dilute the flavor, but it will catch up quickly. 

Vanilla powder is a wonderful substitute for vanilla extract when you don’t want to add more liquid to a recipe, such as in ice cream or frosting recipes.  It's very easy to make.

Homemade Vanilla Powder
Source:  recipezaar.com
012

INGREDIENTS: 
1/2 cup granulated sugar
1 vanilla bean
1/2 tsp. cornstarch

Cut the bean into 1 to 2 inch segments.  Put pieces into a clean spice/coffee grinder and grind into small pieces, about 1 minute.  Add sugar and cornstarch and blend for about 2 minutes, or until the sugar is a fine powder.  Sift contents through a fine sieve to remove any small pieces of vanilla bean that were not sufficiently milled.  Store in clean, sterilized, airtight glass container away from sun, light and heat.  The powder should be stored for at least 2 weeks before using.

Tuesday, June 29, 2010

BOURBON PECAN SHORTBREAD

A friend, (a local East Carolinian) who has a pecan tree in his backyard, gave us a huge bag of pecans.  Beautiful, big North Carolina pecans.  I was happy to get such a big bag of these yummy nuts and felt that I should reciprocate by baking something nice, something using the pecans.

I don't know about you, but shortbread is one of my favorite things to eat.  It's buttery, tender and not overly sweet.  When you add pecans, you get even more of a buttery taste.  The bourbon, while a nice idea, doesn't really add anything discernible to the cookie.  You can drizzle the shortbread with melted chocolate or caramel, if you really want to take it over the top, but I like it just as it is.  So nice with a cup of tea.

Monday, June 28, 2010

A TALE OF TWO CUPCAKES

006
My hubby’s not big on desserts.  There are a few faves, though, that he can’t resist.  One is chocolate cupcakes with chocolate frosting.  I decided to try two different but similar recipes to see which was the better:  Hershey’s Especially Dark Chocolate Cake & Frosting, and Martha Stewart’s “the best…One-Bowl Chocolate Cake.”
Martha has substituted buttermilk for regular milk in her recipe, which is an adaptation of  Hershey’s old-time recipe.  She’s also bumped up the cocoa and baking soda and reduced the oil, sugar, baking powder and vanilla.  Instead of using boiling water in the batter, Martha uses warm water and it gets mixed in with the other ingredients, instead of at the end.  I wanted to try Martha’s recipe for chocolate frosting, but I had enough of the Especially Dark Chocolate Frosting left over to frost the second batch of cupcakes. 

Hershey’s cake is moist, light and chocolatey and the frosting is perfect.   The cupcakes, which remind me a little of the old-time chocolate Tasty-Kakes, got rave reviews all around from my taste testers.  Here is a photo of Hershey’s cake, with the inside, as you can see, almost black, and note how high and nicely crowned the cupcake is:
004
Martha’s cake is moister and more chocolatey with a hint of fudginess without truly being fudgy.  I would pick Martha’s cake as the winner, except for two things:  if you want cupcakes, as I did, you will be disappointed in the way the batter rises, then collapses.  You will have to pile on the frosting to cover up the sink hole, and I usually frost cupcakes lightly.  Secondly, it’s hard to figure out how much batter to use for each cupcake to keep it from spreading over the rim.  For these two reasons, I can’t give this recipe a high rating.
Here is a photo of Martha’s cupcake, not as dark, but with a hint of fudginess and slightly moister than Hershey’s.  With a lot of frosting to cover the sink hole, no one is the wiser. 
018
Bottom Line:  Go for Hershey’s recipe.  It’s easy, it’s foolproof, and it’s a real winner in taste and texture.  You’ll get a nice highly crowned cupcake that looks as pretty as it tastes.
Especially Dark Chocolate Cake and Frosting
Adapted from Hershey’s
Rating:  9.5 out of 10
PRINTABLE RECIPE
INGREDIENTS:
1 cup superfine sugar (pulse granulated sugar in food processor, then remeasure)
3/4 cup plus 2 Tbsp. unbleached all-purpose flour, lightly spooned into cup
1/4 cup + 2 Tbsp. Hershey’s Special Dark Cocoa
3/4 tsp baking powder
1/2 tsp. sea salt
3/4 tsp. baking soda
1 large egg
1/2 cup milk
1/4 cup vegetable or canola oil
1 tsp. pure vanilla extract
1/2 tsp. coffee essence (equal parts of instant coffee granules + coffee liqueur) my addition
1/2 cup boiling water

Set out all ingredients an hour ahead of baking time to bring them to room temperature.  Heat oven to 350F.  Set out a 12-cup muffin tin; line with paper baking cups.

In large bowl, whisk together sugar, flour, cocoa, baking powder, salt and baking soda.  Add egg, milk, oil, vanilla and coffee essence and beat on lowest speed of mixer till combined, then beat on medium speed 2 minutes, scraping sides and bottom.  Stir in water to make a thin batter.  Divide batter evenly among baking cups, using about 1/4 cup per cupcake.  Bake about 14-16 minutes, or till a toothpick inserted near center returns with just a few crumbs.  Cool in pans a few minutes, then transfer cupcakes to wire rack to cool completely.  Place cooled cupcakes in freezer for about 10 minutes to make it easier to frost them. 

Especially Dark Chocolate Frosting
Adapted from Hershey’s
Rating 9.5 out of 10

INGREDIENTS:
1/2 stick (1/4 cup) butter, melted
1/3 cup Special Dark cocoa
1-1/2 cups confectioner’s sugar
2-3 Tbsp. milk, regular or light (I  used lite coconut milk)
1/4 tsp. pure vanilla extract
1 tsp. coconut flavored rum (optional, my addition)

Combine butter and cocoa in medium bowl.  Add 1/2 cup sugar and beat till smooth on medium speed of electric mixer.  Add 1 Tbsp. milk and the flavorings and beat till smooth.  Repeat with sugar and milk twice more.  Adjust frosting to make it of desired spreading consistency by adding more milk if it’s too thick, or more sugar if it’s too thin.  Beat on high speed for several minutes till frosting is whipped.  Frost cupcakes or cake immediately, or refrigerate frosting till reading to use it.  Refrigerate leftovers for several weeks, or freeze.  Yield:  enough for 2 dozen cupcakes or one 2-layer cake. 
003
One-Bowl Chocolate Cake
Adapted from marthastewart.com
Rating:  6 out of 10
PRINTABLE RECIPE
INGREDIENTS:
1/4 cup + 2 Tbsp. natural unsweetened cocoa powder
3/4 cup unbleached all-purpose flour
3/4 cup sugar
3/4 tsp. baking soda
1/4 + 1/8 tsp. baking powder
1/4 + 1/8 tsp. sea salt
1 large egg
1/4 cup + 2 Tbsp. buttermilk (or add 1 tsp. white vinegar to regular milk, let stand 15 min.)
1/4 cup + 2 Tbsp. warm water
1-1/2 Tbsp. vegetable or canola oil
1 tsp. pure vanilla extract

Set out all ingredients one hour ahead of baking to bring to room temperature.  Heat oven to 350F.  Set out a 12-cup cupcake tin and line with 11 paper liners.  (Martha says this makes one dozen, but I got 10 cupcakes.) 

Sift into medium bowl cocoa powder, flour, sugar, baking soda, baking powder and salt.  With electric mixer on lowest speed, mix till combined.  Add egg, buttermilk, water, oil, and vanilla.  Stir to combine, then beat on medium speed till smooth, about 3 minutes.  (My batter was smooth well before 3 minutes, so I only beat the batter about 1-1/2 minutes.)

Divide batter evenly among baking cups, using a little less than 1/4 cup each.  Do not fill to the top, as the batter puffs up, then sinks, and you will have cupcake collapsing over the sides.  You only want the batter to rise up to the top, not over.  Therefore, fill the cups almost 2/3 full.  You can see in the photo below that I filled the cups a little higher, and note that when they sank, they spread.  I had to cut the excess off the cupcake before I frosted them.  I’m theorizing there’s enough extra batter in the rims for one more cupcake, not 2, but I could be wrong. 
013

Bake 14-16 minutes, or till a toothpick inserted near center returns with just a few crumbs.  Let cool in pan a few minutes, then transfer to wire rack to cool completely.  Place cooled cupcakes in freezer about 10 minutes to facilitate frosting.  Yield:  11-12 cupcakes

Friday, June 25, 2010

BANANA-CHOCOLATE CHIP CUPCAKES

014

This recipe, adapted from Martha Stewart, uses a lot of bananas (3-4).  While you will get a pronounced banana flavor in these moist, mildly sweet treats, you will have to be a banana lover.  For me, I found myself burping banana after one cupcake. 

But I can hardly call these cupcakes, since they are mixed like a muffin and the batter is more like a muffin batter.  Since these are more like muffins than cupcakes, you can even leave the frosting off if you prefer.  The cupcake I sampled had no frosting and it was good by itself.  There is no milk, yogurt or sour cream in these, and Martha recommends mixing them in one bowl.  (Since you have to melt butter, though, it makes more sense to me to first melt the butter, then  mix all the liquids in with the butter before you  add to the dry ingredients.)   The chocolate chips were my addition.  Martha uses a honey cinnamon frosting, but I knew my hubby would never go for that.  The last batch of banana cupcakes I made were frosted with vanilla cream cheese frosting and he moaned that he preferred chocolate.

012

Yes, Martha has come up with a different recipe, but it’s not high on my list.  My top-rated banana bread, cake or cupcake is still my old Pillsbury recipe.  That being said, for those of you out there who are banana lovers, this may be your recipe.  You definitely will get a banana load from these!

Banana-Chocolate Chip Cupcakes
Adapted from Martha Stewart
Rating:  7.5 out of 10
PRINTABLE RECIPE
INGREDIENTS: 
1/4 cup (1/2 stick) unsalted butter
1 cup unbleached all-purpose flour
1/2 cup white whole wheat flour
3/4 cup sugar (I used 1/2 cup sugar + 1 Tbsp. NuNaturals Stevia) 1 tsp. baking powder
1/2 tsp. baking soda
1/4 tsp. sea salt
1/2 cup chocolate chips
1-1/2 cups mashed bananas (about 3-4 ripe bananas, depending on size)
2 large eggs
1/2 cup unsweetened applesauce
1 tsp. pure vanilla extract

Heat oven to 350F.  Line a standard 12-cup muffin pan with paper liners.  In a medium microwaveable bowl, melt butter on high, covered, about 45 seconds, or till almost melted.  Set aside to cool slightly.

In a large bowl, whisk together flours, sugar, baking powder, baking soda and salt.  Stir in chocolate chips.  Add bananas, eggs, applesauce and vanilla to melted butter and whisk till well combined. 

002
Make a well in dry ingredients.
001 
Add liquids all at once, stirring lightly with a spoon or spatula just till barely combined.  Do not overmix. 

003
Divide batter evenly among the 12 muffin cups, using about 1/4 cup for each.  Bake 14-16 minutes, or till a toothpick inserted near center returns with just a few crumbs.  Cool on wire rack.  Serve plain or with your favorite frosting.  Yield:  12 cupcakes

004

Wednesday, June 23, 2010

GREEN PAPAYA SALAD


One of the increasingly popular menu items at Thai restaurants across the country is green papaya salad.  I first heard about this salad from a Burmese refugee living in Texas, but I was unable to find a green papaya.  Then Molly Wizenberg wrote about it in the May 2010 issue of Bon Appetit.  I tried harder to find the green papaya, but continued to strike out.  Finally, green papayas came into season and they were everywhere.  Who knew they were a seasonal item?  
The salad is a perfect example of Thai food:   a beautiful balance of salty, sweet, spicy and sour flavors.   But a firm, hard, green papaya must be used. 

If the papaya is at all soft, you will have a rubbery, chewy and tough salad.

I gave it to my two testers:  my hubby (a Northern transplant to the South), and Brad (a local New Bernian).  They both gave it two thumbs up, way up.  Brad says he eats everything, and Guy says he likes the sweet/hot combo of flavors.   Get the recipe for green papaya salad....

Monday, June 21, 2010

WHOOPIE PIES

WhoopiePieCookies
I went on a whoopie pie baking streak.  Three different whoopie pies.  But only one made the grade with me. 
The first was a Food Network Magazine recipe for Red Velvet Whoopie Pies.   red velvet whoopie pies (3)
I found these a bit dry with too much chocolate/cocoa for red velvet.  They weren’t very red because of all the chocolate.  They were delicately cakey and not very sweet.  The over-all flavor is good, but I would not make them again.  I rate them a 6 out of 10.
Next, I adapted a highly rated allrecipes.com recipe, Ultimate Maple Snickerdoodles
003
Instead of cinnamon, I used Chai spice, but kept the maple syrup in.  I sprinkled the tops with Chai spice and sugar instead of cinnamon and sugar.  And I sandwiched them with vanilla cream cheese frosting.  They were way too sweet for me.  The cookies, by themselves, were good though, so I may make them again.  I rate them an 8 out of 10.  They won’t be sandwiched in the future though.
The winner was Whoopie Pie Cookies, a recipe sent to Penzey’s Spices from Candy Johnson.   005
whoopie pies (2)


The cookies are moist, soft, not too sweet and mate perfectly with the sweet frosting.  The only thing I changed was to add some coffee essence to the batter.  This last batch was  received with praises from all.  A definite keeper.


008Whoopie Pie Cookies
Adapted from penzeys.com
Rating:  9.5 out of 10
PRINTABLE RECIPE
INGREDIENTS:
1/2 large egg (one large egg = about 3-1/4 Tbsp.  1/2 large egg = about 1-1/2 Tbsp.)
2-1/2 Tbsp. vegetable oil
1/2 cup sugar
1 cup unbleached all-purpose flour
1/2 tsp. vanilla powder  (or 1/2 tsp. vanilla extract added with wet ingredients)
1/4 cup natural unsweetened cocoa powder
1/2 tsp. baking soda
1/8 tsp. sea salt
1/4 cup buttermilk (or add 3/4 tsp. vinegar to sweet milk and let stand 15 minutes)
1/2 tsp. coffee essence -- optional (equal parts instant coffee powder + coffee liqueur)

Heat oven to 350F.  Line baking sheets with greased parchment paper.

In medium bowl, whisk egg, oil and sugar till smooth.  On wax paper or in small bowl, whisk together flour, cocoa, vanilla powder (if using), baking soda and salt.  Add 1/3 of the dry mixture and beat with spoon or spatula till combined.  Now add 1/2 the milk and the coffee flavoring (and vanilla extract if using) and beat again till combined.  Repeat, ending with flour mixture.  Do not overbeat, just be sure to combine all ingredients well. 

Drop batter by tablespoons onto cookie sheets, several inches apart.  Bake 8-10 minutes, until top springs back when lightly touched.  Remove  to wire racks to cool.  When cool, spread filling between two cookies to make sandwiches.  Yield will depend on size of cookies, but expect about 12 sandwiches from 24 cookies.

Marshmallow Creme Filling
1 stick butter or Smart Balance 50/50 Butter Blend
1 cup powdered sugar, sifted first
1 cup marshmallow creme or fluff
1 tsp. pure vanilla extract

In medium bowl, combine all ingredients and beat till light and fluffy.

Saturday, June 19, 2010

GRILLED MUSSELS WITH WHITE WINE SAUCE

004
Here is a super-easy recipe that makes a perfect appetizer for company.  Just combine the sauce ingredients in a bowl, grill the mussels then add them to the sauce.  Toss it all together and serve.  
Grilled Mussels with White Wine Sauce
Source:  Coastal Living, July 2003
Rating:  9 out of 10
INGREDIENTS:
2 pounds mussels
1/2 cup fresh lemon juice, divided
6 Tbsp. butter or margarine, melted
1 cup drinking-quality dry white wine
1/4 tsp. hot sauce
1/2 tsp. dried crushed red pepper
2 garlic cloves, minced
1/8 tsp. sea salt
1/8 tsp. freshly ground black pepper
1/3 cup coarsely chopped fresh parsley

Remove beards on mussels; scrub shells well with a stiff brush.  Discard open or cracked mussels.  Set aside.

Combine 1/4 cup lemon juice, melted butter, wine, hot sauce, red pepper and garlic; set aside.

Sprinkle mussels with salt, black pepper and 2 Tbsp. lemon juice.  Place mussels in a grill basket (I put the mussels in a baking pan).  Grill, with lid closed, over high heat (400F – 500F) about 10 minutes or until shells open.  Discard any unopened mussels.  Add mussels to lemon mixture; toss well.  Drizzle with remaining lemon juice, and sprinkle with parsley.  Serve immediately.