Saturday, June 15, 2013

HAZELNUT MINI CHEESECAKES WITH CHOCOLATE-HAZELNUT CRUST AND NUTELLA TOPPING

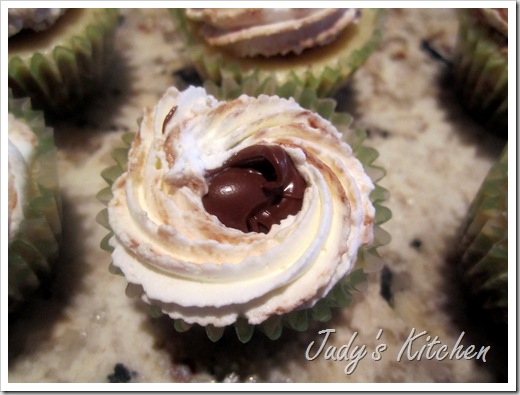
hazelnut mini chcakes (2)

Mini desserts are popular, especially with the older folks who might just want a “taste” of something rather than a super-sized version.  This is my own recipe, and it was a big hit with my taste testers who said the mini cheesecakes were “to die for.”   The hazelnut flavor really comes through, thanks to hazelnut liqueur, hazelnut flavoring from Spices, etc., hazelnut paste and toasted hazelnuts.

The cooled cheesecakes are topped with Nutella.
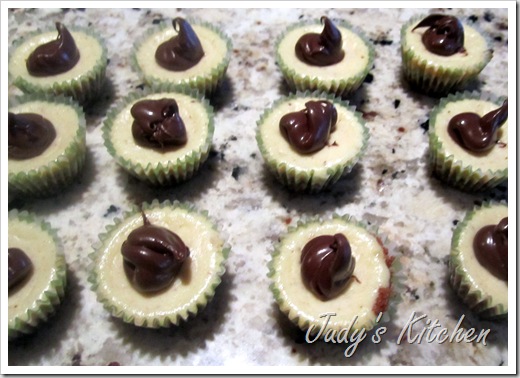
hazelnut mini chcakes (3)

Then sweetened whipped cream is piped around the Nutella.  hazelnut mini chcakes
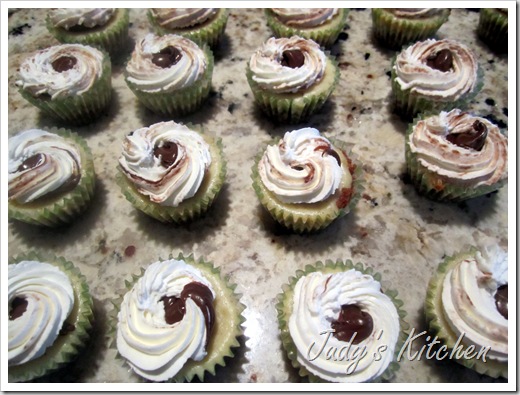
Hazelnut Mini Cheesecakes with Chocolate-Hazelnut Crust and Nutella Topping
Rating:  10 out of 10

Click for PRINTABLE PAGE

CRUST: 1/2 cup hazelnut meal or almond meal (Bob’s Red Mill)
3 Tbsp. coarsely chopped hazelnuts or almonds
2 tsp. butter
2 Tbsp. hazelnut paste, purchased or homemade (recipe follows)
3 Tbsp. sugar
1/2 Tbsp. natural unsweetened cocoa powder

Pulse all ingredients in food processor to combine.  Press about 1/2 Tbsp. onto bottoms of 24 paper-lined mini muffin pan cups.  Refrigerate.

Hazelnut Paste – If you cannot find hazelnut paste, here is a recipe to make it:
1  cup hazelnuts
1/3 cup confectioner’s sugar
pinch of salt
1 tsp. hazelnut liqueur
1 small to medium egg white

Heat oven to 350F.  Roast nuts 8-10 minutes till skins are dark brown and nuts are aromatic; immediately wrap nuts tightly in clean kitchen towel and place in warm place, such as your microwave oven, turned off, of course, 5-7 minutes to steam.  Rub nuts vigorously in the towel to remove as many of the skins as possible.  Transfer skinned nuts to quart-size plastic storage bag and pound with meat mallet till well crushed and pulverized.  (You can put the whole nuts right in your food processor, but crushing them first is easier on blades.)  Process crushed nuts in food processor till almost turned into hazelnut butter, scraping sides and bottom of work bowl as needed.  Add remaining ingredients and pulse till smooth and well combined.  Store in refrigerator up to two weeks.  Do not eat raw, use only in baked products.  Yield:  about 3/4 cup paste

CHEESECAKE FILLING:  
8 oz. Philadelphia brand cream cheese, or Neufchatel cheese
1/4 cup hazelnut paste
2 Tbsp. sugar
1 large egg 
1/2 tsp. hazelnut flavoring (Spices, etc. online)
1/4 tsp. pure vanilla extract
1 tsp. hazelnut liqueur
1 Tbsp. heavy cream

Heat oven to 325F.  In work bowl of food processor, pulse cream cheese, hazelnut paste and sugar till smooth.  Scrape sides and bottom of bowl; add egg, flavorings and liqueur and pulse till again smooth.  Add cream and pulse just till combined.  Spoon about 1 Tbsp. filling over each chilled crust.  Bake 15-17 minutes, or till cheesecake is just set.  Cool 5 minutes in pan, then turn out onto wire rack to finish cooling.

TOPPINGS: 
Nutella or Jif Chocolate-Hazelnut spread
Sweetened whipped cream

Spoon or pipe about 1 tsp. Nutella in the center of each cheesecake.  Pipe sweetened whip cream around edges.  Refrigerate.  Yield:  24 mini cheesecakes

Saturday, June 8, 2013

INTENSE DARK HAZELNUT HEAVEN CUPCAKES WITH CHOCOLATE HAZELNUT FROSTING

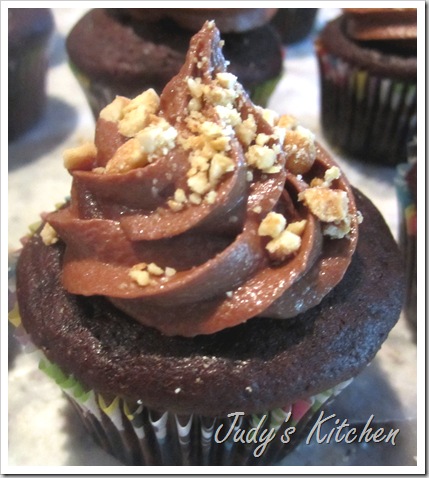
intense dark hazelnut heaven cupcakes (4)

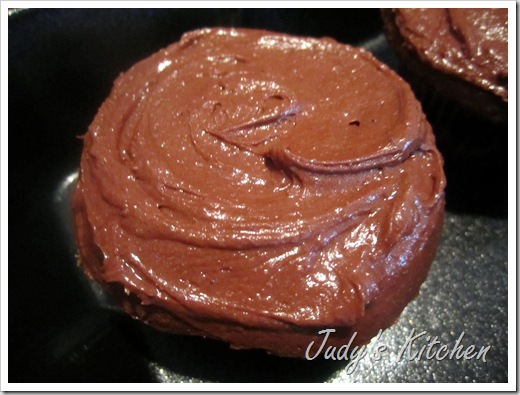
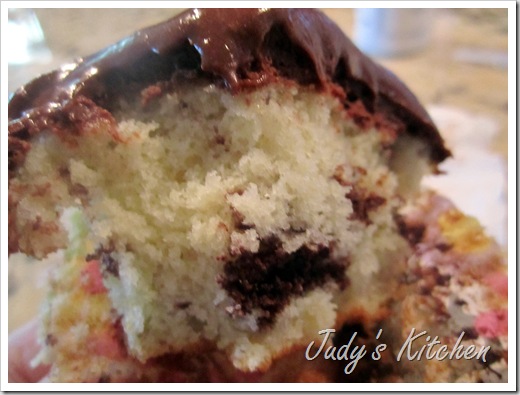
No, these are not chocolate cupcakes.  Rather, they’re sumptuous vanilla cupcakes laced with a grated dark chocolate-hazelnut bar. 
intense dark hazelnut heaven cupcakes (3)
The frosting uses cocoa and the remaining chocolate bar.   You should get 18 moist, light and tender standard cupcakes (or 12 cupcakes plus 24 mini cupcakes) if you fill each well about 2/3 full.  For best results, measure carefully, use the proper ingredients and follow directions as written.
intense dark hazelnut heaven cupcakes

Intense Dark Hazelnut Heaven Cupcakes with Chocolate Hazelnut Frosting
Rating:  9.5 out of 10

Click for PRINTABLE PAGE

CUPCAKES: 
1-1/2 cups unbleached all-purpose flour, whisked then lightly spooned and leveled
1 cup sugar
2-1/2 tsp. baking powder
1/2 tsp. Diamond kosher salt
6 Tbsp. unsalted butter, cool room temperature, pliable, cut into cubes
1/2 cup whole milk minus 1 Tbsp. + 1/4 cup whole milk minus 1-1/2 tsp., divided use
1/2 tsp. pure vanilla extract
1-1/2 tsp. hazelnut flavor (I used Spices, etc., available online)
2 large eggs, room temperature
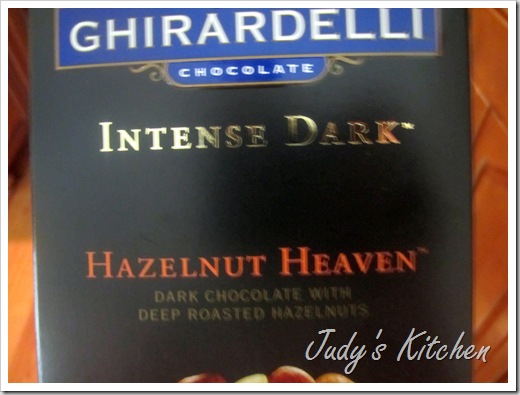
1 (3.5 oz.) bar Ghiradelli Intense Dark Hazelnut Heaven, grated, divided use

Line cupcake tins with paper liners.  Sift flour, sugar, baking powder and salt into bowl of stand mixer fitted with the paddle attachment.  Combine on stir speed about 30 seconds.  Add butter, 1/2 cup milk minus 1 Tbsp., vanilla and hazelnut flavorings.  Combine on stir speed, then beat on low 1-1/2 minutes.  Add eggs, one at a time, beating each on low speed till combined.  Scrape sides and bottom of bowl with spatula.  Using stir speed, add remaining 1/4 cup minus 1-1/2 tsp. milk.  Beat 1 minute on low speed. 

Fill standard cups with 1-1/2 Tbsp. batter, then sprinkle with about 1 Tbsp. grated chocolate bar and top with 1-1/2 Tbsp. batter.  This should fill the cups to about 2/3 full.  For mini cupcakes, use 2 tsp. batter, 1 tsp. grated chocolate, 2 tsp. batter.  Bake standard cupcakes 15-18 minutes and minis 9-11 minutes, or till cupcakes spring back when lightly touched.  Cool cupcakes in tins 5 minutes, then transfer to wire racks to cool for at least one hour.  Yield:  18 standard cupcakes or 12 standard and 24 mini cupcakes

CHOCOLATE HAZELNUT FROSTING:
Remaining grated chocolate hazelnut bar
1 cup + 1 cup confectioner’s sugar, divided use
3 Tbsp. unsweetened natural cocoa
4 Tbsp. unsalted butter, cool room temperature, pliable
1/8 tsp. Diamond kosher salt
3-4 Tbsp. whole milk or cream
1 Tbsp. hazelnut liqueur, such as Frangelica
1/2 tsp. hazelnut flavor

Microwave remaining chocolate bar in small microwaveable bowl on high in 25-second increments until just melted.  Stir, set aside.  Sift together into small bowl or onto wax paper 1 cup confectioner’s sugar and cocoa; set aside.

Cream butter and salt on medium speed of electric mixer.  Gradually add remaining 1 cup of confectioner’s sugar, beating until smooth after each addition.  Combine milk (or cream), liqueur and hazelnut flavor in small cup.  Alternately add milk mixture and cocoa-sugar mixture to the creamed butter mixture, beating until smooth after each addition.   On low speed, beat in the melted chocolate hazelnut bar.  Frost cupcakes as desired with this delicious but very rich frosting.

Thursday, May 23, 2013

RED CHILE-RUBBED BABY BACK RIBS WITH FRESH GINGER GLAZE

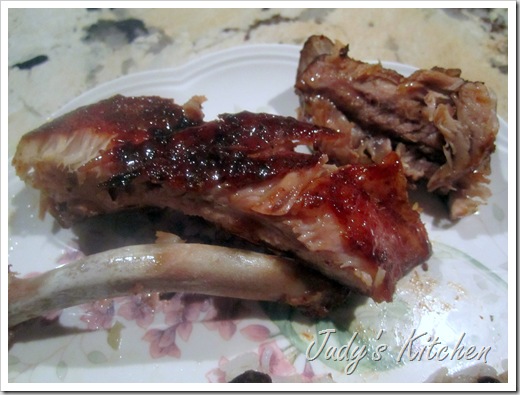
red chili rubbed baby back ribs

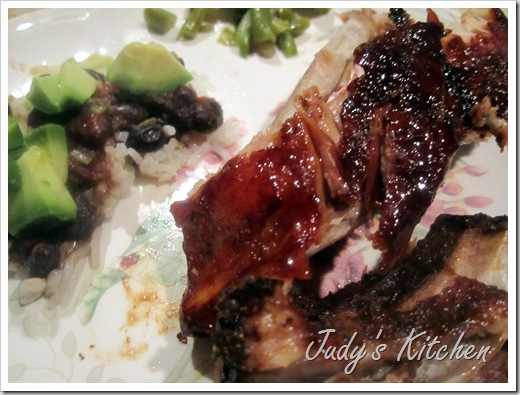
I found my new favorite rib recipe, from the June 2010 Better Homes and Gardens magazine.  Their recipe used 3 slabs of baby back ribs, though, and for just hubby and me this was too much.  So I tweaked the ingredient amounts for 1 slab, enough for us for two meals.  The number of servings will vary according to what you’re serving with the ribs and how big your appetites are. 
I love the perfectly balanced, just-sweet-enough, just-hot-enough flavors in the rub and glaze and the smokiness from the wood chips. 
red chili rubbed baby back ribs (2)
The recipe is specific in the chile type:  ancho.  If you don’t have ancho chile powder and can’t find it, you can substitute another chile, but you’ll need to know where the other chile places on the heat scale of chiles.  For instance, if you substitute chipotle chiles, you’ll need less because chipotles are hotter than anchos.  I didn’t have ancho chile powder, but I did have some dried ancho chiles that I washed, seeded, chopped and ground in my spice grinder.  I probably should have left the seeds in, because anchos are fairly mild anyway.  If you use the ingredients as they’re listed in the recipe, you’ll have fairly mild ribs.  If you want heat, add some chipotle chile powder. 

Red Chile-Rubbed Baby Back Ribs with Fresh Ginger Glaze
Adapted from Better Homes and Gardens, June 2010
Rating:  10 out of 10

CLICK FOR PRINTABLE PAGE

RIBS:
1-1/2 tsp. ancho chile powder
3/4 tsp. paprika
3/4 tsp. dark brown sugar
1/2 tsp. Diamond kosher salt
3/4 tsp. ground cumin
3/4 tsp. granulated garlic
3/4 tsp. black pepper
1 slab meaty baby back ribs, about 2-1/2 lbs.
3-4 handfuls of hickory wood chips, soaked in water at least 30 minutes

FRESH GINGER GLAZE:
2 Tbsp. low-sodium soy sauce
2 Tbsp. dark brown sugar
1-1/2 Tbsp. ketchup
1-1/2 Tbsp. lemon juice
1/2 tsp. grated fresh ginger

Make the glaze:  In small saucepan over medium heat, combine the glaze ingredients.  Bring to simmer, stirring occasionally, and cook over low heat for about 3 minutes.  Remove from heat.

Prepare the ribs:  With mortar and pestle, or spice grinder, grind together chile powder, paprika, sugar, salt, cumin, garlic and black pepper.  Using a dull dinner knife, slide the tip under the membrane covering the back of ribs.  Lift and loosen membrane until it breaks loose from the meat.  Using paper towels to grip, pull membrane off.  Season ribs all over with the spice rub.  Wrap in plastic wrap and refrigerate three hours or up to overnight.  Remove ribs from fridge 1/2 hour before grilling. 

Prepare grill for indirect cooking over low (275F - 300F) heat.  For a 3-burner grill, this means firing up the left and right burners and leaving the middle burner off.  Just before grilling ribs, drain 2 handfuls of wood chips and place them on coals or in smoker box of a gas grill.  Position the chips so the smoke will permeate the ribs.  For us, that meant placing the smoker box on the left rear grate.  When the chips begin to smoke, remove plastic wrap and place ribs over the unlit burner.  Close lid.  Cook about 45 minutes, periodically checking the grill thermostat without  opening the lid, to be sure temperature stays at 300F.  After 45 minutes, add some water to chips and rotate the ribs for even cooking.  Close lid.  Cook another 45 minutes.  Remove chips.  Lay ribs on sheet of foil.  Brush lightly with glaze on both sides.  Wrap foil tightly and place again on unlit burner.  Close lid.  Cook 30-45 minutes, or  till ribs are tender.
Yield:  2-4 servings

TIP:  Have rub and glaze left over?  Try it on chicken – delicioso!

Friday, May 17, 2013

OVERNIGHT WHOLE-WHEAT CHOCOLATE CUPCAKES WITH PEANUT BUTTER FILLING AND CHOCOLATE-PEANUT BUTTER FROSTING

001 Want to make a man happy?  Just give him peanut butter and chocolate.  These cupcakes made my man and his friends ecstatic.   None of these health-food-averse creatures suspected that there were whole grains and a sugar substitute in their treat.   (The cupcake was adapted from Beantown Baker’s blog and from Flour, a well-known Boston bakery.  The frosting is my own.  Next time, I’ll work on reducing the fat content, too.)

What I like about this cupcake recipe is its simplicity.  Just mix the batter with a whisk, cover and refrigerate overnight or up to three days.  It took me two days to get to it.  By then, the batter that started out thin had become thick and spongy and was easy to scoop into the cupcake tins.  To divide the batter equally among 12 cups, you’ll use less than 1/4 cup though.  The cupcakes rise up and crown nicely, and they’re sturdy, though a tad crumbly.  The temptation here is to use a 1/4 cup ice cream scoop and just make fewer cupcakes, probably about 10 or 11.  Don’t do that, because you’ll get those ugly wide rims from too much batter.  You can use an ice cream scoop, but remove about a tablespoonful of batter before filling the liner.  You can make your own peanut butter filling, but why bother when Peanut Butter & Co. makes the divine White Chocolate Wonderful Peanut Butter.  It’s perfect for a filling.

Here are some more chocolate cupcake recipes that I’ve rated highly:  Chocolate Banana Cupcakes, Dairy-Free Cocoa Cupcakes, 100% Whole Wheat Chocolate Cupcakes, and Guinness Chocolate Cupcakes.

Overnight Whole-Wheat Chocolate Cupcakes with Peanut Butter Filling and Chocolate-Peanut Butter Frosting
Rating:  9.5 out of 10

Click for PRINTABLE PAGE

CUPCAKE: 
1/2 cup sugar + 2 Tbsp. NuNaturals white stevia powder OR 1 cup sugar
1/2 cup (4 oz.) unsalted butter, cut in 8 pieces
1/2 tsp. Diamond kosher salt
1/3 cup water
2 oz. (2 squares) Baker’s unsweetened chocolate, chopped
1/4 cup Dutch-process cocoa powder
1/2 cup milk
1 large egg
1 large egg yolk
1/2 tsp. pure vanilla extract
1/2 tsp. chocolate flavor (from Spices, etc. online – optional but nice)
1/2 cup unbleached all-purpose flour + 1/2 cup white whole wheat flour OR 1 cup AP flour 
1 tsp. baking powder
1/2 tsp. baking soda

FILLING:
About 1/2 cup Peanut Butter & Co. White Chocolate Wonderful Peanut Butter*

FROSTING:
4 Tbsp. unsalted butter, soft
1/3 cup Peanut Butter & Co. White Chocolate Wonderful Peanut Butter
1-1/2 cups confectioner’s sugar
1/4 cup unsweetened cocoa powder, Dutch or natural
2-3 Tbsp. mild-tasting plain Greek yogurt, such as Fage
1 Tbsp. Kahlua or coffee
1-1/2 oz. bittersweet or semi-sweet chocolate, melted, cooled slightly

GARNISH:  About 1/3 cup honey-roasted peanuts, chopped or crushed

*Peanut Butter & Co.’s line of delicious flavored peanut butters can be found at Wal-Mart and many grocery stores and also online.

Make the cupcakes:  In a small saucepan over medium heat, melt the sugar, butter, salt and water, stirring as needed.  Place the chocolate and cocoa powder in a medium bowl; pour the butter mixture over and whisk till the mixture is smooth.  Whisk milk, egg, yolk, vanilla and chocolate flavor (if using) into chocolate mixture till combined. 

In medium bowl, whisk together flours, stevia, baking powder and baking soda; add to chocolate mixture and whisk till smooth.  Let batter sit at room temperature for 1 hour, or cover and refrigerate for up to three days. 

When ready to bake cupcakes, remove batter from fridge and set oven to 350F.  Line a 12-cup muffin tin with paper liners.  Use about 3 Tbsp. batter for each cup.  Bake about 17-22 minutes, or till a toothpick inserted near center returns with a few crumbs.  (My cupcakes took 19 minutes.)  Transfer cupcakes to a wire rack to cool completely before filling and frosting.

Make the frosting:  In medium bowl, beat butter and peanut butter on low speed to smooth and well combined.  Sift sugar and cocoa powder together.  Gradually add to butter mixture with the yogurt, mixing on low, then on medium speed after each addition till mixture is again smooth.  Add Kahlua (or coffee if using).   If frosting is too thin at this point, add up to 1/2 cup additional sifted sugar to bring it to frosting consistency.  Add melted chocolate, and beat mixture on medium-high till smooth and well combined.  Yield:  enough to generously frost 12 cupcakes. 

Assemble the cupcakes:  Scoop the centers of the cupcakes with a serrated spoon or Cuisipro cupcake corer.  Use discarded cupcake pieces for snacks.  Transfer peanut butter to a resealable sandwich bag.  Snip end of one corner to make a 1/2” – 3/4” hole through which you will pipe the peanut butter into the cupcake cavity.  Frost cupcake with swirls using a Wilton 1M or 2D decorating tip, or apply frosting with a knife.  Garnish with crushed honey-roasted peanuts, if desired. 

TIP:  Don’t discard the egg white!  Add it to your scrambled eggs, or freeze it to use for marshmallow frosting  or Swiss Buttercream frosting.

Thursday, May 9, 2013

HUMMINGBIRD CUPCAKES WITH CREAM CHEESE FROSTING

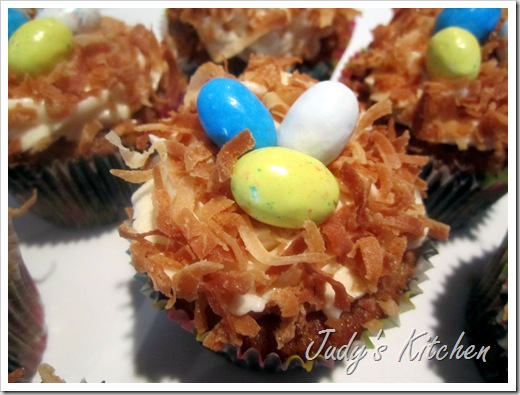
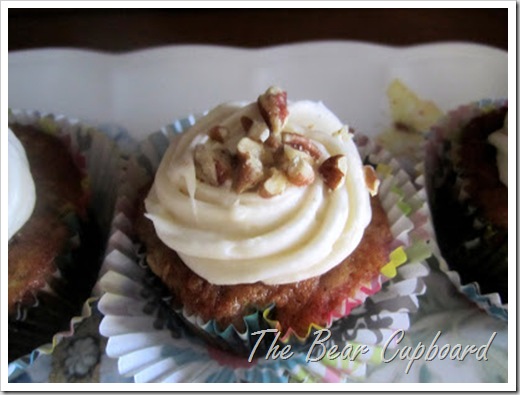
hummingbird cupcakes (2)

Hummingbird cupcakes are appropriate for any time of the year, but are particularly nice for Spring.  The flavors of pineapple, bananas and pecans wake up your tastebuds and make you feel as if Spring has arrived.  I made these for Easter dinner with friends, one of whom is severely lactose intolerant.  While these cupcakes are dairy-free, the frosting and malted milk balls are not.  So, in case he didn’t want to scrape off the frosting, I also made Dairy-Free Cocoa Cupcakes with Peanut Butter Filling and Marshmallow Frosting. 

The Hummingbird cupcakes were adapted from a recipe on the Food Network website by The Neelys.  Theirs is made with butter which I switched out for oil.  I increased the butter in the frosting and decreased the sugar.  These are decorated for Spring, but they can also be served with cream cheese frosting garnished with chopped nuts instead of the nest effect of toasted coconut topped with malted milk eggs.  Though these were very tasty and well received, my favorite recipe is a Southern Living recipe for a Hummingbird cake that I adapted to cupcakes.

hummingbird cupcakes (3)

Hummingbird Cupcakes with Cream Cheese Frosting
Rating:  9.5 out of 10

Click for PRINTABLE PAGE

CUPCAKES:
1 cup unbleached all-purpose flour, whisked then lightly spooned and leveled
1/2 tsp. baking powder
1/2 tsp. baking soda
1/2 tsp. cinnamon
1/4 tsp. Diamond kosher salt
1/2 cup (4 oz.) unsalted butter, soft
1/2 cup sugar
2 large eggs
1 tsp. pure vanilla extract
1/2 cup chopped toasted pecans
1/4 cup crushed pineapple packed in juice
2/3 cup mashed very ripe bananas (about 2 large)

Heat oven to 350F.  Line a 12-cup muffin pan with paper liners.  In medium bowl, whisk together flour, baking powder, baking soda, cinnamon and salt.  In large bowl, cream butter and sugar on medium speed of electric mixer till light and fluffy, about 3-4 minutes.  Beat in eggs, one at a time, mixing just till incorporated and adding vanilla with last egg.  On low speed, add flour mixture gradually, beating only till just incorporated and being careful not to over mix.  Stir in pecans, undrained pineapple and bananas using a spoon or spatula. 

Use a 1/4 cup ice cream scoop to fill paper liners 3/4 full.  Bake 16-18 minutes, or till a toothpick inserted near center returns with just a few crumbs.  Transfer cupcakes to a wire rack to cool completely before frosting.  Yield:  12 cupcakes

CREAM CHEESE FROSTING:
4 oz. cream cheese, soft
4 Tbsp. unsalted butter, soft
1 cup confectioner’s sugar
1 tsp. pure vanilla extract

In a medium bowl, using medium speed of electric mixer, beat cream cheese and butter till smooth.  Gradually add powdered sugar, beating till again smooth after each addition, and adding vanilla with last addition.  Continue to beat after all sugar has been added and frosting is fluffy and light.  Yield:  enough frosting for 12 cupcakes

Monday, May 6, 2013

PERFECT PILLOW = PERFECT SLEEP


Perfect pillow = perfect sleep.  Well, not always.  It's more complicated than that.  Speaking as a long-time insomnia sufferer, sleep can be affected in a variety of ways.  I had fixed all the major causes of my insomnia (copper poisoning, carb overload, magnesium deficiency, lack of exercise).  Once I got all that under control, I was left with the pillow problem.  I just couldn't find one that didn't give me a pain in the neck, literally.
A 1979 car wreck left me with a neck problem.  After trying all the pillows out there, I decided to give up looking and just hold on to my old, flattened shred of a pillow that was no longer a pillow.  There was no loft left, no softness, no comfort.  In short, I was miserable.  I was able to get a night's sleep, but I wanted a new pillow and couldn't find one.

Then my hubby, a bored retiree who has discovered the internet, who also needed a new pillow, found Sweet Spot Pillow.  He ordered a queen-size pillow with regular support and loved it from day 1.  Soon he was telling everyone about his new pillow, and others were purchasing it and loving it as well.  Skeptically, I decided to try his and was surprised at how comfortable it was.  So I decided to order one.

The Sweet Spot Pillow is available in different sizes and different support models so you can customize your pillow to your needs.  The website has "The Pillow Advisor" to help you make your selection, but because of what I'd been through with my neck, I needed more help.  So I contacted customer service.  The end result is that I now have a low-profile standard pillow, and I've never been happier.  I can rest easy because my neck does not hurt when I go to bed.  In fact, I'm so happy with this pillow, I just had to give Sweet Spot Pillow a shout-out.  If you need a new pillow, try them out.

Full disclosure:  I have not been compensated in any way for this endorsement.  I was not asked to make this endorsement, it was completely my idea, just sharing the love.

Saturday, May 4, 2013

WINNER ANNOUNCED


The winner of the Friendship Dairies $75 gift bag is bluang3lbby.  

Congratulations to the winner.  Please email me your name and mailing address by
midnight Sunday, April 5.  If I do not hear from you by then, another winner will be selected.